Category Archives: VS 2017

About the new privateregistry.bin file of Visual Studio 2017

As I explained in the post Some implications of the new modular setup of Visual Studio 2017 for VSX developers, Visual Studio 2017 introduces among others two significant changes compared to Visual Studio 2015:

  • It allows several Visual Studio editions (Community, Professional, Enterprise) to coexist at the same time on the same machine. For VSX developers, this means that Visual Studio 2017 installations now use different folders on disk, and instance Ids.
  • It uses its own private registry. This post is about this.

From Visual Studio .NET 2002 to Visual Studio 2008, Visual Studio used two registry keys:

  • HKEY_LOCAL_MACHINE\SOFTWARE\WOW6432Node\Microsoft\VisualStudio\<version>: this per-machine entry was created when Visual Studio was installed (which required admin rights) and 3rd party extensions could add registry entries to it (to register packages or DDEX providers, etc.) because it was never deleted (otherwise Visual Studio would become unusable and would require reinstallation).
  • HKEY_CURRENT_USER\SOFTWARE\Microsoft\VisualStudio\<version>: this per-user entry was created the first time Visual Studio was launched for a user account, and contained per-user settings. It was never deleted (otherwise user settings would be lost).

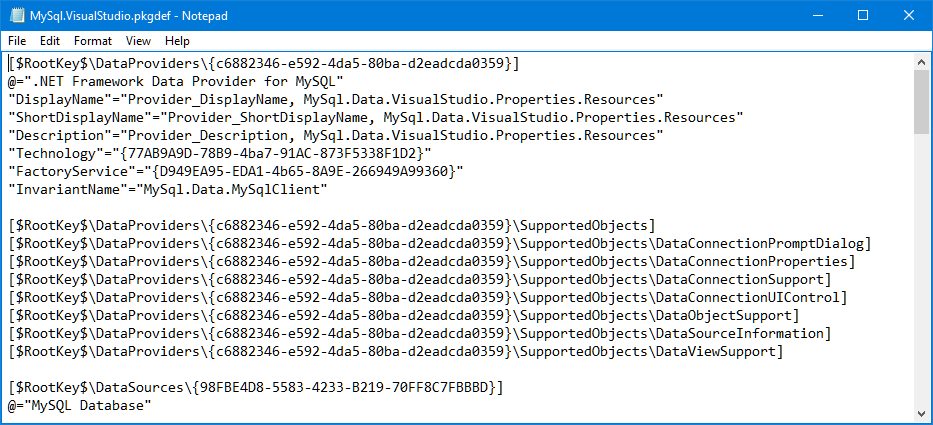
This worked fine for a few years, until Microsoft wanted Visual Studio not to require admin rights to run or even to install 3rd party extensions, and to allow file-based registration of such extensions using .pkgdef files. So, a third registry key was introduced:

  • HKEY_CURRENT_USER\SOFTWARE\Microsoft\VisualStudio\<version>_Config
that per-user entry was created by Visual Studio when it deemed it convenient merging two sources:
  1. The per-machine Registry configuration, HKEY_LOCAL_MACHINE\SOFTWARE\WOW6432Node\Microsoft\VisualStudio\<version>
  2. Per-user and per-machine .pkgdef files on disk.

So, from time to time, Visual Studio 2010 copied to a per-user configuration the per-machine configuration (source #1) along with per-machine and per-user .pkgdef files on disk (source #2). This process happened when Visual Studio was launched for the first time on a user account, after a change of configuration, etc. And for this to work, at run-time the devenv.exe process redirects  HKEY_LOCAL_MACHINE\SOFTWARE\WOW6432Node\Microsoft\VisualStudio\<version> to HKEY_CURRENT_USER\SOFTWARE\Microsoft\VisualStudio\<version>_Config.

All that means that 3rd party setups of extensions shouldn’t write directly to the HKEY_CURRENT_USER\SOFTWARE\Microsoft\VisualStudio\<version>_Config key, because it could be deleted and created again at any time. Instead, setups should either write directly to HKEY_LOCAL_MACHINE\SOFTWARE\WOW6432Node\Microsoft\VisualStudio\<version> (which requires admin rights), to HKEY_CURRENT_USER\SOFTWARE\Microsoft\VisualStudio\<version> (which doesn’t require admin rights), or, better yet, avoid completely writing to the registry and use instead .pkgdef files on disk, either on per-machine folders (which requires admin rights) or on per-user folders (which doesn’t require admin rights).

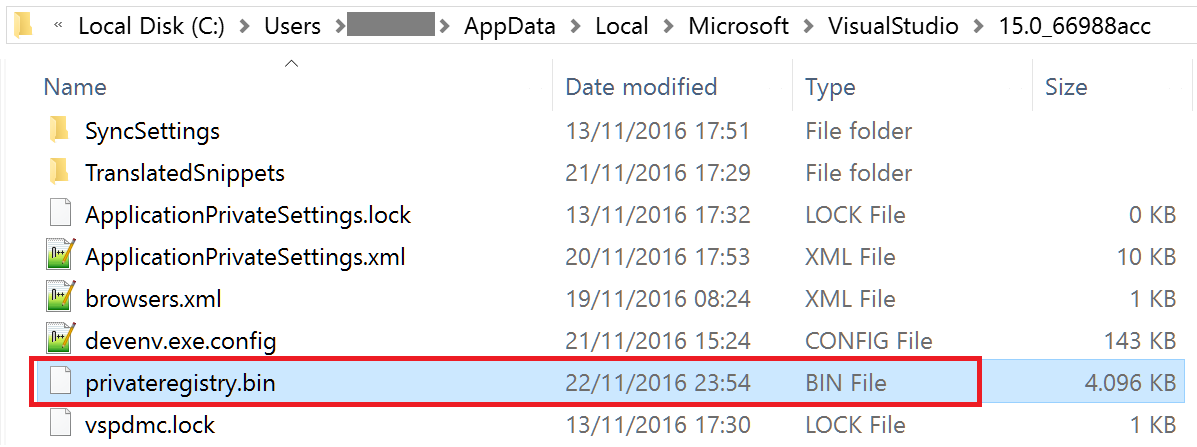
So far so good, but now Visual Studio 2017 stops using those three registry keys and it uses its own private registry. This is a file named privateregistry.bin which is located in the (hidden) folder C:\Users\<user>\AppData\Local\Microsoft\VisualStudio\<version>_<instance-id>, where <version> is 15.0 and <instance-id> is a random value determined when each Visual Studio 2017 edition is installed:

If you want to use regedit.exe to load that private registry, follow the steps detailed in How to examine Visual Studio 2017 registry. You will end seeing this:

At this point you should be aware of all this in Visual Studio 2017:

  • The private registry (privateregistry.bin file) is per-user, not per-machine. As such, it is not created when Visual Studio is installed, but when Visual Studio is launched for the first time for a user account.
  • The private registry provides two keys: 15.0_<instance-id> and 15.0_<instance-id>_Config.
  • The key 15.0_<instance-id> is equivalent to HKEY_CURRENT_USER\SOFTWARE\Microsoft\VisualStudio\<version> in previous versions. As such, it is never deleted (otherwise a user would lose her per-user configuration).
  • The key 15.0_<instance-id>_Config is equivalent to HKEY_CURRENT_USER\SOFTWARE\Microsoft\VisualStudio\<version>_Config in previous versions. As such, it can be deleted and recreated by Visual Studio when it needs to update the configuration.
  • There is no per-machine private registry. So, there is no equivalent of HKEY_LOCAL_MACHINE\SOFTWARE\WOW6432Node\Microsoft\VisualStudio\15.0 (well, such key exists, but it stores minimal settings). The installation of Visual Studio 2017 uses exclusively per-machine .pkgdef files instead that are scanned when Visual Studio is loaded for the first time for a user account to create the key 15.0_<instance-id>_Config in the per-user private registry.
  • At run-time, the devenv.exe process of Visual Studio 2017 redirects registry operations on Visual Studio keys to the privateregistry.bin file. So, this change is transparent for extensions (DLLs) that run in the devenv.exe process. Setups (which are external processes) are not so lucky. While they could use the RegLoadAppKey function to write to the 15.0_<instance-id> key for per-user extensions (never for 15.0_<instance-id>_Config, which would be overwritten later), it is much better to switch to .pkgdef files on disk (either per-machine, or per-user). If you really need to mess with the Visual Studio setup, then see Microsoft/vs-setup-samples.

Sample code and utilities to get installed Visual Studio 2017 editions programmatically

As I explained in the post Some implications of the new modular setup of Visual Studio 2017 for VSX developers, Visual Studio 2017 has changed all that you knew about installations of Visual Studio. In this episode of Channel 9, Art Leonard explains to Robert Green the internals of this re-architecture of Visual Studio:

The use of a private registry file causes that if you want to know programmatically the installed editions of Visual Studio 2017, the old approaches don’t work. For example, my article HOWTO: Detect installed Visual Studio editions, packages or service packs is now obsolete.

Fortunately, Microsoft provides a new Setup API to query the installed editions of Visual Studio 2017 or the highest VSIXInstaller.exe, along with sample code and utilities:

Visual Studio Setup Configuration Samples
Microsoft/vs-setup-samples
“This is a sample in various programming languages that demonstrates how developers can use the new Visual Studio setup query API. The included samples show how to use the new setup configuration API for discovering instances of Visual Studio 2017”.

Visual Studio Locator
Microsoft/vswhere
“Over the years Visual Studio could be discovered using registry keys, but with recent changes to the deployment and extensibility models a new method is needed to discover possibly more than once installed instance. These changes facilitate a smaller, faster default install complimented by on-demand install of other workloads and components. vswhere is designed to be a redistributable, single-file executable that can be used in build or deployment scripts to find where Visual Studio – or other products in the Visual Studio family – is located.”

Visual Studio Setup PowerShell Module
Microsoft/vssetup.powershell
“This PowerShell module contains cmdlets to query instances of Visual Studio 2017 and newer. It also serves as a more useful sample of using the Setup Configuration APIs than the previously published samples though those also have samples using VB and VC++.”

VSIX Installer Bootstrapper
Microsoft/vsixbootstrapper
“An installer that can be chained with other packages to locate the latest VSIXInstaller.exe to use for installing VSIX extensions. One of the great new features of Visual Studio 2017 is an initial smaller and fast install. To compliment a smaller – but powerful – initial feature set, installing additional workloads and components on-demand is supported for both end users and package developers. Package developers can install their VSIX extensions for Visual Studio using this bootstrapper to find the latest version of VSIXInstaller.exe and install their extension(s). This may be preferable for extensions that support Visual Studio 2017 or newer than installing extensions in Windows Installer .msi packages, since MSIs cannot run concurrently in separate processes. Other deployments may also benefit since they no longer have to find where VSIXInstaller.exe is installed. The command line passed to VSIXBootstrapper.exe is passed through to VSIXInstaller.exe.”

Building a VSIX extension with the Visual Studio 2017 Build Tools

As I explained in the post Migrating the build of a VSIX project to a build server if you are a solo developer, I am taking the steps to build my MZ-Tools extension on a build/release server. As part of that process, I realized than rather than installing Visual Studio 2017 Community edition on the server, I could use the Visual Studio 2017 Build Tools that were thought, well, for build servers that don’t need the overhead of a Visual Studio 2017 installation. They are a lightweight version of Visual Studio 2017 without the IDE (devenv.exe executable). They can be used to build either managed (C#, VB.NET, etc.) projects or native (C++) projects. Incidentally my MZ-Tools solution has both type of projects.

The Visual 2017 Build Tools can be downloaded from here. Once you install them on a clean machine, you will notice that they provide only the following:

  • A built-in (non-optional) set of components to build MSBuild-based projects (for example managed projects).
  • An optional workload “Visual C++ build tools”.
  • An optional workload “Web development build tools”.

There are also optional individual components to install .NET Framework 4.6.1 support Windows SDKs, ATL support, etc.:

In my case my extension needs to use .NET Framework 2.0 for some projects (I still support Visual Studio 2005). Since that version is not installed by default on modern versions of the Windows OS, I need to install it going to “Control Panel”, “Programs and Features” item, “Turn Windows Features on or off” link:

My obfuscator tool needs the .NET Framework 3.5 SDK (or the .NET Framework 2.0 SDK). While the Visual Studio 2017 Community installer provides the optional individual component “.NET Framework 3.5 developments tools”, the installer of Build Tools 2017 doesn’t. That is not only a pity but also causes a bug if you install yourself the Windows 7.0 SDK that contains the .NET Framework 3.5 SDK that I reported here: the resource .resx files of a .NET project targeting .NET Framework 2.0 are compiled using the Assembly Linker (al.exe tool) of the .NET Framework 4.0, which will cause them to fail silently at run-time. Microsoft fixed the bug just in time for RTM in Visual Studio 2017, but the Build Tools 2017 still has the bug due to the lack of the “.NET Framework 3.5 developments tools”. There is a fix that I explained in the bug report if you find this problem. I have also requested to Microsoft to include the “.NET Framework 3.5 developments tools” in the installer of Build Tools 2017.

My extension for Visual Studio targets version 2012, so I need to stick to .NET Framework 4.5, not some higher version. Since that version is not provided by the Build Tools 2017, I need to install the Windows 8.0 SDK, that contains the .NET Framework 4.5 assemblies and SDK.

For the C++ projects, I needed to install:

  • “Visual C++ ATL Support”: required to get files such as atlbase.h, etc.
  • “Windows 8.1 SDK”: I could upgrade to some Windows 10 SDK version but they occupy much more space on disk.
  • “UCRT SDK”: the Universal Common RunTime that provides files such errno.h and other files in the folder “C:\Program Files (x86)\Windows Kits\10\Include\10.0.10240.0\ucrt”.
  • “.NET Framework 4.6.1 SDK”: to get files such as mscoree.h / mscoree.lib in the folder “C:\Program Files (x86)\Windows Kits\NETFXSDK\4.6.1\”.

My build script uses tf.exe to set a workspace and download the latest sources. Alas, tf.exe is not installed with Build Tools 2017 (Visual Studio 2017 installs the Team Explorer extension, that contains that file in the folder “C:\Program Files (x86)\Microsoft Visual Studio\2017\Community\Common7\IDE\CommonExtensions\Microsoft\TeamFoundation\Team Explorer”). Now there is a standalone installer for Team Explorer (that includes tf.exe) announced here. Since that’s a bit overkill, I just copied tf.exe and the required dlls.

The build script needs also nuget.exe, but that’s easy to get.

So, when I thought that I had all the required components installed, I tried to build the extension. I got the following problems:

First, the error “Error’MSB4226: The imported project “(…)\VSSDK\Microsoft.VsSDK.targets” was not found.” Initially I thought it was a bug, that I reported to Microsoft here, but I discovered that the problem was solved setting the “VisualStudioVersion” MSBuild property, something that a machine with the full Visual Studio 2017 does and that a machine with the Build Tools 2017 does if you open a developer command prompt. Since I was not using it, I passed it as a parameter to the MSBuild script. It can be defined too inside the .csproj file, something that previous Visual Studio versions did automatically but recent versions don’t.

Then I got an error about a missing Microsoft.VisualStudio.Settings.15.0 file. How is that a file from Visual Studio is required by the NuGet package that provides the Visual Studio SDK?. It happens that Microsoft.VsSDK.Build.Tasks.dll, the file that contains the MSBuild tasks needed when creating a VSIX file, references it. But on a machine without Visual Studio, that dll is not present. I discovered that despite the error, the VSIX file was generated correctly, so that DLL was required for a task after generating the VSIX file. That task is to deploy the generated VSIX file to the experimental instance for debugging. Since on a release server that step is not needed, I knew how to instruct the .csproj project file to avoid it:

<PropertyGroup Condition=" '$(Configuration)|$(Platform)' == 'Release|AnyCPU' ">
   ... 
   <!-- Do not deploy the extension in Release configuration -->
   <DeployExtension>False</DeployExtension>
</PropertyGroup>

Finally, when I thought that all obstacles were solved, I got an error about the Microsoft.Visualstudio.Shell.Interop.dll being delay-signed rather than strong-signed. Since my development machine has tons of Visual Studio versions and SDKs, I discovered that all the Microsoft.Visualstudio.Shell.Interop.dll files were strong-named except an old one, which somehow Microsoft shipped delay-signed, and that was the one that I was referencing. So, I only need to change it by the correct version. And finally, my extension generates a VSIX file on a release server with only the Build Tools 2017 plus some additional components, but without Visual Studio 2017 installed.

The next step is to install some agent to connect to the Build/Release Management of Visual Studio Team Services.

Migrating the build of a VSIX project to a build server if you are a solo developer

Some months ago I started a long and slow journey to migrate the build process of my MZ-Tools extension from a custom .NET-based builder that ran on my development computer to Visual Studio Team Services, leveraging its Build management and Release management capabilities. My goals are to learn those capabilities and, well, to use them as if I were a team. I haven’t reached yet that destination but I have made significant progress and I am quite close now. In the process I have realized somewhat ashamed that I wasn’t following the best practices in a lot of places. I say “somewhat” because there are some mitigating circumstances:

  • Being a solo developer it is too easy to arrange things in such a way that only works on your development machine. You don’t have a team to warn you that it doesn’t work outside your development machine.
  • Even if you change your development machine to a new one from time to time, or use two development computers, you use the same username and tend to install and configure the software in the same way.
  • My Visual Studio solution and some projects were born in the year 2002, with the first Visual Studio .NET. At that time Team Foundation Server, NuGet, MSBuild, etc. didn’t even exist on paper.
  • I have all the Visual Studio versions and VS SDKs from 2005 to 2017 installed on my development machine. That causes that you don’t think carefully where a DLL is referenced from.
  • I have also all the .NET Frameworks and SDKs from .NET Framework 2.0 installed on my development machine. Another source for undocumented hidden dependencies.
  • My Visual Studio solution has become quite complex over the years with several projects and technologies:
    • One project that uses .NET Framework 2.0 and C# for the core plug-in, that is reused at binary level for many Microsoft’s IDEs.
    • Four projects with host adapters for Visual Studio (2005, 2008, 2010) as add-in, VBA (Microsoft Office 2000 or higher, even on Windows XP), VB 6.0 and VB 5.0, using .NET Framework 2.0, C# and 3rd party tool for the setups.
    • One project with a host adapter for Visual Studio (2012, 2013, 2015 and 2017) as package, using .NET Framework 4.5, C#, and VSIX.
    • Four projects with COM Shims for VBA (32-bit and 64-bit), VB 6.0 and VB 5.0 using Visual C++, ATL, Windows 8.1 SDK and the .NET CLR loader APIs.
    • One project for a portable version for VBA, using .NET Framework 2.0 and C#.
    • Help file and online help generated by a 3rd party tool.
    • Two projects with integration tests.
    • Obfuscation performed by a 3rd party tool, that requires delay signing.

Microsoft tends to create a new VSIX with each new Visual Studio release but most of us want to create a single package and single VSIX for as many Visual Studio versions as possible, using always the latest Visual Studio version for development (Visual Studio 2017 at the time of this writing). If this is your case, even if your solution is not as complex as mine, ask yourself these questions:

In the process that I have followed first I envisioned the final result:

  • I would use the hosted agent of the Build management of Visual Studio Team Services to provide the following benefits:
    • Gated check-ins to prevent code that breaks the build.
    • Gated check-ins to prevent code that violates code analysis rules.
    • Integration tests. This will require a major effort because I use my own test runner and testing framework instead of Visual Studio Test with the MSTest framework.
  • I would use a private agent on the Release server with the Release management of Visual Studio Team Services to provide the following benefits:
    • Tracking of releases deployed to the test environment, to the pre-production environment and to the production environment.
    • Maybe automated releases.

For these purposes I decided that I would use a new “Build” configuration of the solution for the Build server. In this configuration the obfuscation, help file and online help, setups, etc. are not created. For the Release server I would use the “Release” solution configuration that performs all those additional steps.

For the Build server it is quite easy and I can use the hosted agent of Visual Studio Team Services since I don’t need any 3rd party tools.

For the Release server I cannot use the hosted agent because I need the 3rd party tools that I use to obfuscate, create the help, setups, etc. In the process I have also removed the need for admin rights that my custom builder required previously (the hosted agent of Visual Studio Team Services doesn’t allow admin rights either).

The milestones would be:

  • Migrate the custom .NET-based builder to a MSBuild script. This took me weeks but it’s done.
  • The solution and projects, when built in “Release” configuration, would auto-increment version numbers and would obfuscate the output assemblies, build the help, setups, etc. with their own MSBuild targets without requiring external steps.
  • A master MSBuild script would perform some additional steps before building the solution (such as creating a workspace, getting latest files, restoring NuGet packages, etc.) and some other steps afterwards (such as publishing and archiving binaries).
  • Build on a separate workspace on my development machine. Previously I was building on the same workspace used for development. I know, I know, a horrible bad practice.
  • Create a separate temporary virtual machine to act as Release server with only Visual Studio 2017 Community edition installed, without previous Visual Studio versions to identify missing dependencies and build with the master MSBuild script.
  • Discard the virtual machine of the previous step and create a new virtual machine with the Build Tools 2017 but without Visual Studio 2017, identify and install missing dependencies, build with the master MSBuild script and document everything. I have reached this point!
  • Install a private Visual Studio Team Services agent on the virtual machine that acts as Release server and launch the master build script from the Release management section of Visual Studio Team Services.
  • Create additional scripts to publish binaries to the pre-production and production environment rather than using manual FTP.
  • Repeat everything with the solution for my ASP.NET web site.

I encourage you to follow the same journey if you are a solo developer (and of course if you are a team). At the very least, the exercise of building on a separate build server with only Build Tools 2017 will unhide you hardcoded paths, references that are not provided by source control or supplied as NuGet packages, etc.

Microsoft now working on conditional payloads for VSIX. And for VS 2017 service release!.

Almost three years ago I created this request on Uservoice:

Conditions support for <Content> section of VSIX manifest

This request tries to solve a problem that is increasingly tricky: while Microsoft (or developers that work within Microsoft) release a new extension for each new Visual Studio version, most of us want desperately to update our existing extensions to support multiple versions of Visual Studio. Ideally we would like to have a single package DLL that targets many Visual Studio versions, but if you want to use the latest extensibility APIs, then most of the time you are forced to add references that demand a new package DLL because those references don’t exist on old versions of Visual Studio. But yet, we would like to ship those different package DLLs in the same unified VSIX file, so that for some versions of Visual Studio the VSIX file deploys a package DLL, and for other versions of Visual Studio the VSIX file deploys a different package DLL. Even you may want to deploy different .pkgdef files, as I explained in the request. And nowadays, with the release of Visual Studio 2017 and its manifest “v3”, we would like even different manifests (“v1” for Visual Studio 2010, “v3” for Visual Studio 2012-2017) within the same VSIX, which would solve the most common question on the forums these days: “How can I make a single VSIX that targets Visual Studio 2010-2017?” (sorry, you can’t).

Today, I have received an update from UserVoice indicating that Microsoft is now working on it, and that it will be “for a future servicing release of Visual Studio 2017”. Big news!!!

You can still vote for the idea to show user demand 🙂

3rd party database tools such as MySQL requiring some work to integrate with Visual Studio 2017

With the release of Visual Studio 2017, some popular database tools such as MySQL no longer appear in the Data Connections node of the Server Explorer even if you have installed current version of MySQL for Visual Studio 1.2.6:

It’s no wonder since if you select the Custom installation you will see that Visual Studio 2017 doesn’t appear yet in the list of possible Visual Studio versions to integrate with:

There is also some bad news: the integration with Visual Studio 2017 is more difficult than in previous versions. Third party database tools had two ways to integrate with Visual Studio using Data Designer Extensibility (DDEX):

The first one, which was valid until Visual Studio 2015, is to create some entries in the Windows Registry. See Registering a Registry-Based DDEX Provider. For data providers and data sources the entries are:
HKEY_LOCAL_MACHINE\SOFTWARE\WOW6432Node\Microsoft\VisualStudio\<version>\DataProviders
HKEY_LOCAL_MACHINE\SOFTWARE\WOW6432Node\Microsoft\VisualStudio\<version>DataSources
Visual Studio merges later and redirects at run-time HKEY_LOCAL_MACHINE\SOFTWARE\WOW6432Node\Microsoft\VisualStudio\<version> to HKEY_CURRENT_USER\SOFTWARE\Microsoft\VisualStudio\<version>_Config, but that’s transparent for the tool.

Since Visual Studio 2017 uses its own private Registry hive (see the Change: Reduce registry impact > Visual Studio registry section of Changes in Visual Studio 2017 extensibility) instead of the Registry entries similar to the ones used by older Visual Studio versions, the previous approach is no longer valid. If the setup of a DDEX provider uses RegLoadAppKey to create entries in that private Registry hive, Visual Studio could wipe out them later when it needs to generate its private Registry hive from .pkgdef files. So, for Visual Studio 2017, the only way is to use .pkgdef files, as explained next.

The second one is to create a .vsix extension (package) that provides enhanced design-time support and uses a .pkgdef file to create those registry entries. See Registering a Package-Based DDEX Provider. This is the approach used by MySQL. For Visual Studio 2015 you can see that it installs an extension in the folder:
C:\Program Files (x86)\Microsoft Visual Studio 14.0\Common7\IDE\Extensions\Oracle\MySQL for Visual Studio\1.2.6.

In that folder you can find the MySql.VisualStudio.pkgdef that creates the registry entries:

So, Oracle needs to modify the MySQL package to support Visual Studio 2017. Alas, their vsix manifest is still using version 1.0:

and that is because they wanted to support Visual Studio 2010, 2012, 2013 and 2015 with a single .vsix file:

  • Visual Studio 2010 only supports manifests with version 1.0.
  • Version 2.0 was introduced by Visual Studio 2012, and it is not backwards compatible, so Visual Studio 2010 doesn’t support it.
  • While Visual Studio 2012, 2013 and 2015 support manifests with version 2.0, they also support manifests with version 1.0. So a single .vsix can target Visual Studio 2010, 2012, 2013 and 2015.
  • Visual Studio 2017 doesn’t support manifests with version 1.0. So, it is not possible to have a single .vsix for Visual Studio 2010, 2012, 2013, 2015 and 2017.
  • Instead, Visual Studio 2017 requires a manifest with version 3.0.
  • Fortunately, version 3.0 is backwards compatible with version 2.0 (version 3.0 adds a Xml entry that is only recognized by Visual Studio 2017 and ignored by previous versions. See section Changes Affecting VSIX Format and Installation). So, a single .vsix can target Visual Studio 2012, 2013, 2015 and 2017.

The bottom line is that two installers will be required for MySQL to target the last five versions of Visual Studio 2010-2017. It’s a pity that Oracle hasn’t used the previous months to make all these changes, frustrating its users.

Using VSIXInstaller.exe to install programmatically an extension to Visual Studio 2015 and Visual Studio 2017

Answering a question in the MSDN VSX forum today, I have learned another change caused by the new VSIX installer (VSIXInstaller.exe) of Visual Studio 2017 that it is worth documenting here.

As you know, in Visual Studio 2015 only one edition (Community, Professional or Enterprise) could be installed on the same machine. Two or more editions couldn’t coexist at the same time. Given that the Enterprise edition includes the features of the Professional edition and that the Community edition is basically the Professional Edition (without some feature such as CodeLens), the VSIX manifest of your extension could target the “Pro” edition and as such it would be installable on any edition (Community, Professional or Enterprise):

Normally a .VSIX file is installed just double-clicking it, so that the VSIXInstaller.exe application is launched. But if you want to install an extension programatically, the VSIXInstaller.exe application offers a few command-line switches:

Notice the /skuName:<name> option: it allows to specify the exact edition (Enterprise, Premium, Pro, Community, etc.) of Visual Studio where you want to install the extension. Which value you would need to use? It happens that for Visual Studio 2015, you can use “Pro” and the extension will be installed happily not only on Visual Studio 2015 Professional, but also on Visual Studio 2015 Community or  (Updated March 1, see comments section) Visual Studio 2015 Enterprise. For example, installing my MZ-Tools extension on Visual Studio 2015 Enterprise edition with this command line works perfectly:

vsixinstaller.exe /skuName:Pro /skuVersion:14.0 “<path>\MZTools8VSPackage.vsix”

(notice that it recognizes my Enterprise edition as Professional edition).

However, the same is not true for VS 2017. Using this command line to install it on my Visual Studio 2017 Enterprise edition:

vsixinstaller.exe /skuName:Pro /skuVersion:15.0 “<path>\MZTools8VSPackage.vsix”

causes this error:

The following command-line is required, targeting specifically the Enterprise edition:

vsixinstaller.exe /skuName:Enterprise /skuVersion:15.0 “<path>\MZTools8VSPackage.vsix”

So, this is another implication of the new modular setup of Visual Studio 2017 for VSX developers. You can query the installed VS 2017 editions with a new Setup API (sample included).

Videos and extensions by Justin Clareburt, Program Manager in Visual Studio Extensibility

Justin Clareburt, Program Manager in Visual Studio Extensibility, and super passionate about VSX and super active in the Microsoft/extendvs Gitter room to help you to update successfully your extension to Visual Studio 2017, has also time to produce videos and to create extensions!:

The first video is with Seth Juarez, about using keyboard mappings in Visual Studio:

And his “hot” extensions:

– Hot Keys: Visual Studio Extension that imports several new keyboard mapping schemes http://aka.ms/hotkeys

– Hot Commands: Provides additional commands and shortcuts for enhanced productivity http://aka.ms/hotcommands

The second video is with Robert Green (Visual Studio Toolbox) about updating your extension to the new Visual Studio 2017:

Microsoft.VSSDK.BuildTools 15.0 no longer in Preview/Release Candidate

Just in case you haven’t noticed it, the NuGet package for Microsoft.VSSDK.BuildTools 15.0 is no longer Preview or Release Candidate (RC, RC2 or RC3) but final release:

As you can see, it has been a long way of previews / RCs to reach this point:

So, it’s time to update that NuGet package and rebuild. Microsoft hasn’t announced yet the release date of the final version of Visual Studio 2017 but it seems that we are approaching that date, at least from the Visual Studio Extensibility point of view. Update (Feb 10): the launch date has been announced for March 7. If you haven’t updated your extension to support VS 2017 yet, the clock is ticking. Here you have the guidance to do it.

It’s time to change the VSIX manifest of your extension to v3 for Visual Studio 2017 compatibility

I still see, even as today Jan 10, people asking why you get this error when trying to install your extension on Visual Studio 2017 RC:

“The following extensions are not compatible with Visual Studio 15. Installation may cause Visual Studio to be unstable”:

or this other one when you try to upload the extension to the Visual Studio Gallery:

“This extension targets Visual Studio 2017 but was not build with an up-to-date VSSDK. Please make sure to update your references and try uploading again. Note: you’ll also need to add Prerequisites to your extension.vsixmanifest.”:

In both cases, the answer is the same: you have just updated the extension.vsixmanifest of your Visual Studio 2015 extension to add 15.0 (for Visual Studio 2017):

 <Installation>
 <InstallationTarget Id="Microsoft.VisualStudio.Community" Version="[14.0, 15.0]" />
 </Installation>

But that is not enough to add compatibility for Visual Studio 2017. Even worse, some people wonder if you can live ignoring those warnings.

The short answer to make an extension compatible with Visual Studio 2017 is the following:

  • You need to build it with Visual Studio 2017, you cannot use Visual Studio 2015 (at least at this time). Updated (Feb 7): actually you can build with VS 2015. Updated (Mar 3): as explained in the FAQ entry Can I build a VSIX v3 with Visual Studio 2015?
  • You need an updated pre-release VS SDK (via NuGet). Updated (Feb 7): The Nuget VSSDK 15.0 is no longer prerelease. This VS SDK generates two additional files (catalog.json and manifest.json) inside the output .vsix file (which being a .zip file really, you can rename and unzip to inspect) that were not present in the .vsix generated by the VS 2015 SDK.
  • You need to update the InstallationTarget range in the extension.vsixmanifest (likely this is the only thing that you have done).
  • You need to convert the extension.vsixmanifest to version 3, which is the only version that Visual Studio 2017 accepts (and the Visual Studio Gallery for extensions targeting Visual Studio 2017). Version 3 is backwards compatible with version 2, which means that all fields are the same (including the Version=”2.0.0″!). The only difference is that version 3.0 adds a mandatory section for the prerequisites. At the very least you need to specify the Visual Studio Core Editor (Visual Studio 2017 has an editor to enter values in a friendly way):
<Prerequisites>
   <Prerequisite Id="Microsoft.VisualStudio.Component.CoreEditor" Version="[15.0.25904.2,16.0)" DisplayName="Visual Studio core editor" />
</Prerequisites>

The long answer, with links to resources is on my post Visual Studio 2017 RC announced. Extensions need some changes, and for advanced topics read Some implications of the new modular setup of Visual Studio 2017 for VSX developers.

Now, once that you have assumed that you need a v3 VSIX manifest for Visual Studio 2017, you may wonder how to support multiple instances of Visual Studio from VS 2010 to VS 2017 with the same .vsix: you can’t, because VS 2010 only accepts manifest v1, while VS 2012, VS 2013 and VS 2015 accept manifest v1, v2 or v3 (backwards compatible with v2), and VS 2017 only accepts manifest v3. You need two .vsix files. So, you have two choices:

  • Create a VSIX with manifest v1 for VS 2010, VS 2012, VS 2013 and VS 2015, and another VSIX with manifest v3 for VS 2017. This is the most suggested approach, but there is a better one.
  • Create a VSIX with manifest v1 for VS 2010, VS 2012 and VS 2013, and another VSIX with manifest v3 for VS 2015 and VS 2017. Why? Because VS 2015 introduced APIs not available in previous versions that you can use in VS 2015 and VS 2017 to make your extension a better citizen, such as How to: Use AsyncPackage to Load VSPackages in the Background and How to: Use Rule-based UI Context for Visual Studio Extensions.
  • Updated (Feb 7): if you are not targeting VS 2010 but only VS 2012 and higher, you can have a single VSIX using v3 for VS 2012, 2013, 2015 and 2017.

To get support from Microsoft, you can become a Microsoft Visual Studio Industry Partner (VSIP) “Basic” level for free and get access to workshops explaining the migration process, or you can use Gitter (Microsoft/extendvs), where people from Microsoft and other VSX developers answer questions, the MSDN Visual Studio Integrate Forum that I visit daily, or StackOverflow. And if you find bugs or want to provide suggestions to Microsoft, you can also send feedback to Microsoft about Visual Studio Extensibility through several ways.