You know that I am such a big fan of targeting multiple Visual Studio versions with the same VSIX file that I wrote an article for MSDN Magazine explaining the approach to target from Visual Studio 2012 to Visual Studio 2017. In that article I didn’t explain how to code sign such VSIX file to work with multiple Visual Studio versions but this week I have got a (personal) code signing certificate.
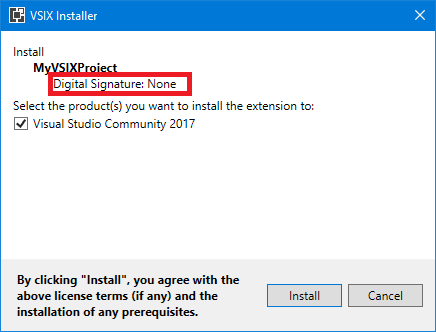
First things first, if you don’t code sign your VSIX file, the VSIX installer shows that the digital signature is none:
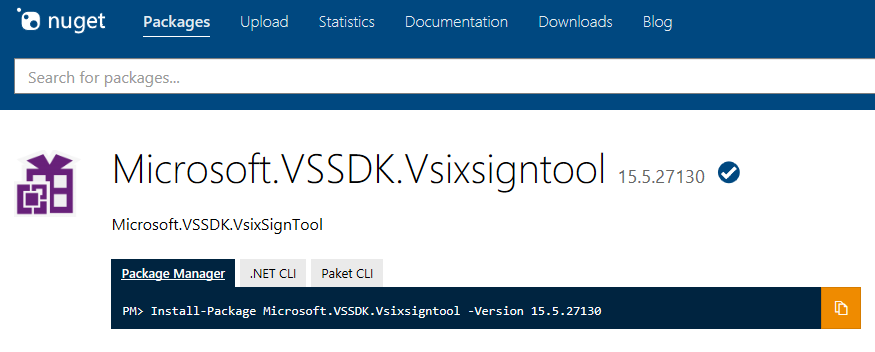
To code sign a vsix file, you can’t use the regular signtool.exe tool of the Windows SDK. You need to use the vsixsigntool.exe that you can get from NuGet:
And the official documentation to sign VSIX packages is here:
In the samples that follow, I will assume that you have the vsixsigntool.exe file and a code signing certificate named CodeSigningCertificate.pfx in the same bin\debug folder that contains a vsix file named MyVSIXProject.vsix.
If you specify in the source.extension.vsixmanifest file that your VSIX package only targets Visual Studio 2012 (11.0) and 2013 (12.0):
 <Installation>
 <InstallationTarget Id="Microsoft.VisualStudio.Professional" Version="[11.0,12.0]" />
 </Installation>
and you sign the VSIX file with with the /fd sha1 option to use the SHA1 algorithm (do not confuse with the /sha1 option, which is used to select the correct certificate):
vsixsigntool.exe sign /f CodeSigningCertificate.pfx /sha1 "<sha1 bytes>" /p MyPassword /fd sha1 MyVSIXProject.vsix
then, although initially you can get this “invalid certificate” error:
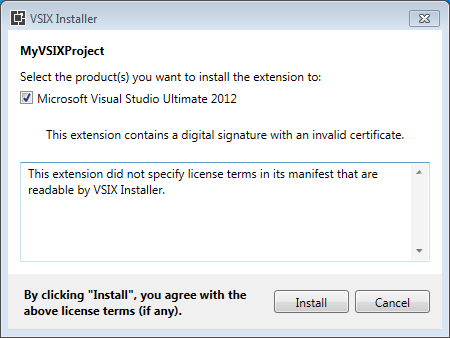
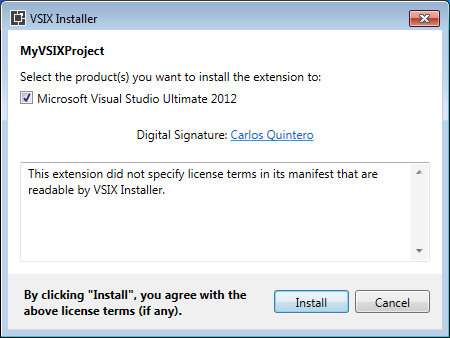
after a few attempts while connected to internet then it works as expected (I don’t know yet why the initial error, does anyone know?):
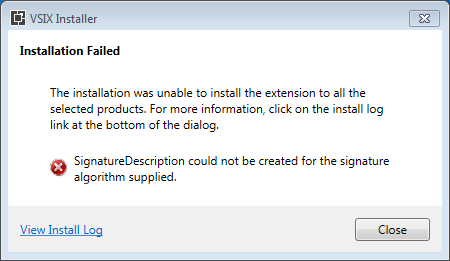
However, if you sign the VSIX file with with the /fd sha256 option to use the recommendable SHA256 algorithm:
vsixsigntool.exe sign /f CodeSigningCertificate.pfx /sha1 "<sha1 bytes>" /p MyPassword /fd sha256 MyVSIXProject.vsix
then you get an error because the algorithm is not supported:
Now, if you specify in the source.extension.vsixmanifest file that your VSIX package only targets Visual Studio 2015 (14.0) and 2017 (15.0):
 <Installation>
 <InstallationTarget Id="Microsoft.VisualStudio.Professional" Version="[14.0,15.0]" />
 </Installation>
and you sign the assembly with with the /fd sha1 option to use the SHA1 algorithm:
vsixsigntool.exe sign /f CodeSigningCertificate.pfx /sha1 "<sha1 bytes>" /p MyPassword /fd sha1 MyVSIXProject.vsix
then the VSIX installer shows “Invalid signature”: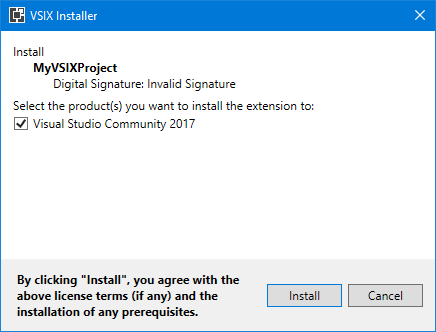
That is because Visual Studio 2015 and higher no longer support the SHA1 algorithm, only the SHA256 algorithm. If you sign the VSIX file with with the /fd sha256 option to use the SHA256 algorithm:
vsixsigntool.exe sign /f CodeSigningCertificate.pfx /sha1 "<sha1 bytes>" /p MyPassword /fd sha256 MyVSIXProject.vsix
then the VSIX installer shows the correct signature: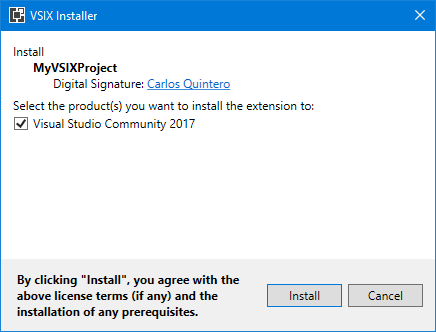
But, what if you specify in the source.extension.vsixmanifest file that your VSIX package targets from Visual Studio 2012 (11.0) to Visual Studio 2017 (15.0)?:
 <Installation>
 <InstallationTarget Id="Microsoft.VisualStudio.Professional" Version="[11.0,15.0]" />
 </Installation>
Of course, using the SHA256 algorithm would case the “invalid signature” warning when installing the VSIX package for Visual Studio 2012 or 2013. But if you use the SHA1 algorithm:
vsixsigntool.exe sign /f CodeSigningCertificate.pfx /sha1 "<sha1 bytes>" /p MyPassword /fd sha1 MyVSIXProject.vsix
then, because the VSIX installer notices that the VSIX package is also valid for Visual Studio 2012 and 2013, it no longer shows “Invalid signature” for Visual Studio 2015 and 2017:

Note: according to Ed Dore in this post, this approach wouldn’t work with older versions of the VSIX Installer if the manifest states explicitly the higher version:
 <Installation>
 <InstallationTarget Id="Microsoft.VisualStudio.Professional" Version="[11.0,15.0]" />
 </Installation>
and the workaround was not to specify the higher version:
 <Installation>
 <InstallationTarget Id="Microsoft.VisualStudio.Professional" Version="[11.0,)" />
 </Installation>
But that bug is already fixed and you can specify the higher version.