Running Visual Studio or setups with DPI virtualization (DPI-unaware) on high DPI displays

This is another cross-post from my other web site, Visual Studio Resources, that may be of your interest as a VSX developer if your extension uses Windows Forms or .NET 2.0/3.0/3.5 tooling (included in WinSDK 7.1, but not in WinSDK 8.0 or higher):

The high-DPI (retina) displays pose some problems to us developers, so that we need to modify our applications to make them DPI-aware. In the post Visual Studio extensions and DPI-awareness I explained how I became DPI-aware and the painful experience to make my application (an extension for Visual Studio) DPI-aware. If you don’t know about DPI-awareness, start with that post.

In this post, I am going to explain how to do the opposite: to make an application that claims to be DPI-aware run as DPI-unaware. Technically this is called DPI virtualization mode, where the application thinks that it is running at 96 dpi and the Windows OS scales its window as a bitmap to the proper size. The result is that the application appears blurred but it’s usable, while in DPI-aware mode it has problems (by the way, if your problem is the opposite, see the Knowledge Base article Some desktop applications may appear blurred on high-DPI displays).

I have found a couple of scenarios where I have wanted some applications to become DPI-unaware even at the cost of appearing blurred on my retina display:

The first case is designing Windows Forms with Visual Studio. Modern versions of Visual Studio (2015, 2017) are truly DPI-aware but they alter the designer files of Windows Forms, so you need to either use a non-retina display, or to use a virtual machine with retina display disabled or to set the retina display scaling to 100% instead of 200% or 250%, which makes everything tiny and unreadable. But there is a better solution: you can make Visual Studio (or any process) DPI-unaware adding the following registry entry:

[HKEY_LOCAL_MACHINE\SOFTWARE\Microsoft\Windows NT\CurrentVersion\Image File Execution Options\devenv.exe]
"dpiAwareness"=dword:00000000

(Thanks to Tanya Solyanik, from Microsoft, that provided me this trick).

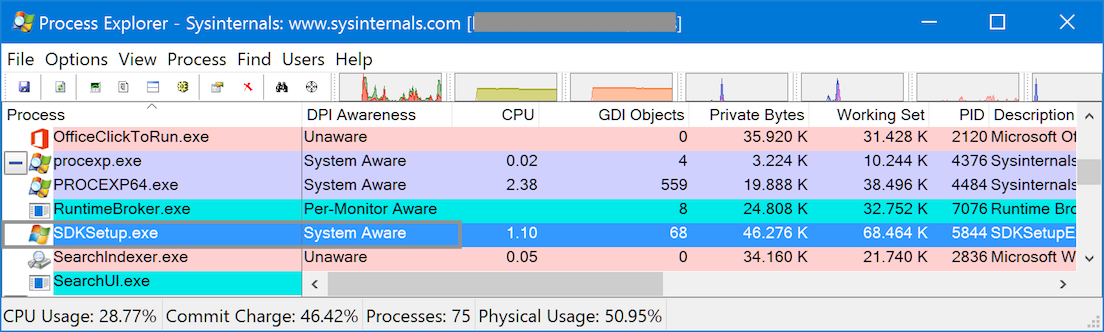
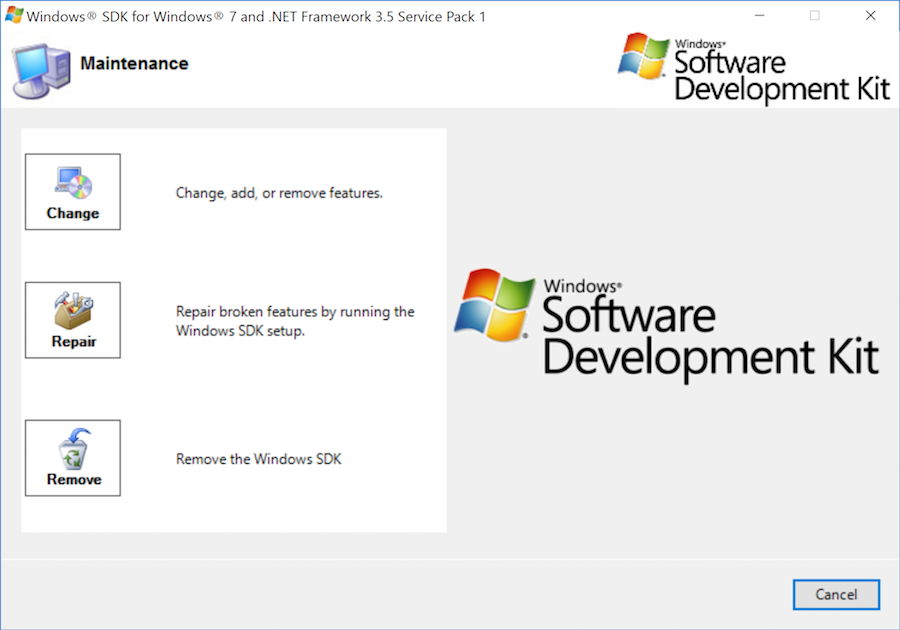
The other case is an application that claims that it is DPI-aware, but it is not really. For example, the setup of the Windows SDK 7.1 (you may download it as winsdk_web.exe, but once executed the process is really sdksetup.exe). You can see here in Process Explorer that it claims that its DPI-awareness is “System Aware”:

But when executed on a retina display, it becomes tiny and truncated:

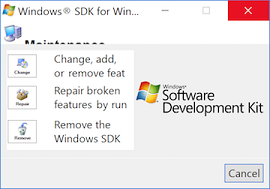
When creating the registry entry above for SDKSetup.exe:

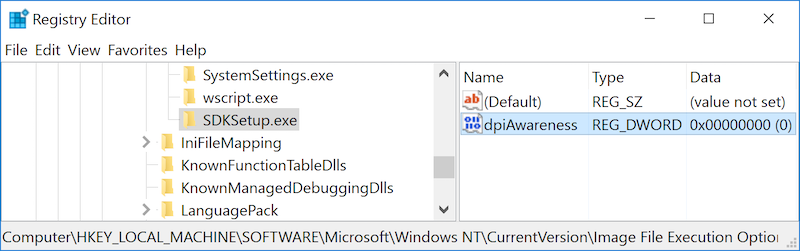
then it displays with the correct size and without truncations, that is, usable (although blurred):

I hope this post helps if you are in one of those two scenarios.

It’s time to change the VSIX manifest of your extension to v3 for Visual Studio 2017 compatibility

I still see, even as today Jan 10, people asking why you get this error when trying to install your extension on Visual Studio 2017 RC:

“The following extensions are not compatible with Visual Studio 15. Installation may cause Visual Studio to be unstable”:

or this other one when you try to upload the extension to the Visual Studio Gallery:

“This extension targets Visual Studio 2017 but was not build with an up-to-date VSSDK. Please make sure to update your references and try uploading again. Note: you’ll also need to add Prerequisites to your extension.vsixmanifest.”:

In both cases, the answer is the same: you have just updated the extension.vsixmanifest of your Visual Studio 2015 extension to add 15.0 (for Visual Studio 2017):

 <Installation>
 <InstallationTarget Id="Microsoft.VisualStudio.Community" Version="[14.0, 15.0]" />
 </Installation>

But that is not enough to add compatibility for Visual Studio 2017. Even worse, some people wonder if you can live ignoring those warnings.

The short answer to make an extension compatible with Visual Studio 2017 is the following:

  • You need to build it with Visual Studio 2017, you cannot use Visual Studio 2015 (at least at this time). Updated (Feb 7): actually you can build with VS 2015. Updated (Mar 3): as explained in the FAQ entry Can I build a VSIX v3 with Visual Studio 2015?
  • You need an updated pre-release VS SDK (via NuGet). Updated (Feb 7): The Nuget VSSDK 15.0 is no longer prerelease. This VS SDK generates two additional files (catalog.json and manifest.json) inside the output .vsix file (which being a .zip file really, you can rename and unzip to inspect) that were not present in the .vsix generated by the VS 2015 SDK.
  • You need to update the InstallationTarget range in the extension.vsixmanifest (likely this is the only thing that you have done).
  • You need to convert the extension.vsixmanifest to version 3, which is the only version that Visual Studio 2017 accepts (and the Visual Studio Gallery for extensions targeting Visual Studio 2017). Version 3 is backwards compatible with version 2, which means that all fields are the same (including the Version=”2.0.0″!). The only difference is that version 3.0 adds a mandatory section for the prerequisites. At the very least you need to specify the Visual Studio Core Editor (Visual Studio 2017 has an editor to enter values in a friendly way):
<Prerequisites>
   <Prerequisite Id="Microsoft.VisualStudio.Component.CoreEditor" Version="[15.0.25904.2,16.0)" DisplayName="Visual Studio core editor" />
</Prerequisites>

The long answer, with links to resources is on my post Visual Studio 2017 RC announced. Extensions need some changes, and for advanced topics read Some implications of the new modular setup of Visual Studio 2017 for VSX developers.

Now, once that you have assumed that you need a v3 VSIX manifest for Visual Studio 2017, you may wonder how to support multiple instances of Visual Studio from VS 2010 to VS 2017 with the same .vsix: you can’t, because VS 2010 only accepts manifest v1, while VS 2012, VS 2013 and VS 2015 accept manifest v1, v2 or v3 (backwards compatible with v2), and VS 2017 only accepts manifest v3. You need two .vsix files. So, you have two choices:

  • Create a VSIX with manifest v1 for VS 2010, VS 2012, VS 2013 and VS 2015, and another VSIX with manifest v3 for VS 2017. This is the most suggested approach, but there is a better one.
  • Create a VSIX with manifest v1 for VS 2010, VS 2012 and VS 2013, and another VSIX with manifest v3 for VS 2015 and VS 2017. Why? Because VS 2015 introduced APIs not available in previous versions that you can use in VS 2015 and VS 2017 to make your extension a better citizen, such as How to: Use AsyncPackage to Load VSPackages in the Background and How to: Use Rule-based UI Context for Visual Studio Extensions.
  • Updated (Feb 7): if you are not targeting VS 2010 but only VS 2012 and higher, you can have a single VSIX using v3 for VS 2012, 2013, 2015 and 2017.

To get support from Microsoft, you can become a Microsoft Visual Studio Industry Partner (VSIP) “Basic” level for free and get access to workshops explaining the migration process, or you can use Gitter (Microsoft/extendvs), where people from Microsoft and other VSX developers answer questions, the MSDN Visual Studio Integrate Forum that I visit daily, or StackOverflow. And if you find bugs or want to provide suggestions to Microsoft, you can also send feedback to Microsoft about Visual Studio Extensibility through several ways.

Licensing the Visual Studio family of products (or using them for free)

This is a cross-post from my other web site, Visual Studio Resources (no longer available). If you as individual or your team are starting to develop paid or open source extensions for the Visual Studio family of products, the first thing is to know which products you can use legally.

A common question that you may have about using legally Visual Studio is which are your options. As always happens with licensing, it is a somewhat complex subject with quite a lot of options, but the good news is that if you are an individual developer or a small team, you can use all the family of Visual Studio products for free. I am not a lawyer, so validate all this information with a lawyer or legal department. The purpose of this post is to provide you the pointers to the different options.

The first thing to know are the products and editions:

  • Visual Studio
    • Visual Studio Community Edition
    • Visual Studio Professional Edition
    • Visual Studio Enterprise Edition
  • Visual Studio Code
  • Azure DevOps (formerly Visual Studio Team Services, VSTS)
  • Azure DevOps Server (formerly Team Foundation Server, TFS)
    • Azure DevOps Server
    • Azure DevOps Server Express Edition

Licensing Visual Studio

Visual Studio Professional Edition and Enterprise Edition are paid versions, while the Community Edition is free for some scenarios.

You can compare the three editions on this page:

Compare Visual Studio Offerings

For Visual Studio Professional Edition and Enterprise Edition, you can compare the purchase options (Standalone for the Professional Edition, or Standard / Cloud subscriptions for both editions) on this page:

Visual Studio Purchasing Options

Visual Studio Community Edition is free under these scenarios (see Visual Studio Community):

  • For individuals: Any individual developer can use Visual Studio Community to create their own free or paid apps.
  • For non-enterprise organizations (meaning those with ≤250 PCs and ≤$1 Million US Dollars in annual revenue): Up to five users can use Visual Studio Community.
  • For enterprise organizations (meaning those with >250 PCs or >$1 Million US Dollars in annual revenue): Visual Studio Community can be used for the following scenarios:
    • In a classroom learning environment
    • For academic research
    • For contributing to open source projects

The exact details for the license terms of the latest Visual Studio versions of the Community edition are here:

MICROSOFT SOFTWARE LICENSE TERMS. MICROSOFT VISUAL STUDIO COMMUNITY 2015

MICROSOFT SOFTWARE LICENSE TERMS. MICROSOFT VISUAL STUDIO COMMUNITY 2017

MICROSOFT SOFTWARE LICENSE TERMS. MICROSOFT VISUAL STUDIO COMMUNITY 2019

Licensing Visual Studio Code

Visual Studio Code is both open source and free. The detailed license is here:

MICROSOFT SOFTWARE LICENSE TERMS. MICROSOFT VISUAL STUDIO CODE

Licensing Azure DevOps (formerly Visual Studio Team Services, VSTS)

Azure DevOps distinguishes three kind of users:

  • Free Stakeholders: you can have unlimited free users with “Stakeholder” access level, with a limited number of features (create, edit and search work items, view backlogs and boards, approve releases, etc.). This access level is not intended for developers (they cannot manage source code in private repositories).
  • Free Users with “Basic” access level.  These can do more things and this level is intended for developers. You can have up to 5 free users with “Basic” access level.
  • Paid Users: If you need more than 5 free users for your team, you need to pay for more users, which get more things than the free users with “Basic” access level, such as a Team Foundation Server CAL (Client Access License) to access an on-premises Azure DevOps Server. For details see: Azure DevOps Server Pricing.

Licensing Azure DevOps Server (formerly Team Foundation Server, TFS)

If you don’t like the idea of using Azure DevOps on the cloud, you can use it on-premises with Azure DevOps Server:

  • For individuals or teams up to 5 developers, you can use the free Azure DevOps Server Express, that you can download here.
  • For teams with more than 5 developers you need to pay for the additional developers as explained here: Buy access to Azure DevOps  or Azure Test Plans.

Finally, the ultimate guide for licensing Visual Studio, Azure DevOps or Azure DevOps Server is this white paper:

Visual Studio Licensing White Paper (May 2019)

Updated (Jul 9, 2019): updated links and names for the latest Visual Studio versions and products