Category Archives: VS Extensibility

3rd party database tools such as MySQL requiring some work to integrate with Visual Studio 2017

With the release of Visual Studio 2017, some popular database tools such as MySQL no longer appear in the Data Connections node of the Server Explorer even if you have installed current version of MySQL for Visual Studio 1.2.6:

It’s no wonder since if you select the Custom installation you will see that Visual Studio 2017 doesn’t appear yet in the list of possible Visual Studio versions to integrate with:

There is also some bad news: the integration with Visual Studio 2017 is more difficult than in previous versions. Third party database tools had two ways to integrate with Visual Studio using Data Designer Extensibility (DDEX):

The first one, which was valid until Visual Studio 2015, is to create some entries in the Windows Registry. See Registering a Registry-Based DDEX Provider. For data providers and data sources the entries are:
HKEY_LOCAL_MACHINE\SOFTWARE\WOW6432Node\Microsoft\VisualStudio\<version>\DataProviders
HKEY_LOCAL_MACHINE\SOFTWARE\WOW6432Node\Microsoft\VisualStudio\<version>DataSources
Visual Studio merges later and redirects at run-time HKEY_LOCAL_MACHINE\SOFTWARE\WOW6432Node\Microsoft\VisualStudio\<version> to HKEY_CURRENT_USER\SOFTWARE\Microsoft\VisualStudio\<version>_Config, but that’s transparent for the tool.

Since Visual Studio 2017 uses its own private Registry hive (see the Change: Reduce registry impact > Visual Studio registry section of Changes in Visual Studio 2017 extensibility) instead of the Registry entries similar to the ones used by older Visual Studio versions, the previous approach is no longer valid. If the setup of a DDEX provider uses RegLoadAppKey to create entries in that private Registry hive, Visual Studio could wipe out them later when it needs to generate its private Registry hive from .pkgdef files. So, for Visual Studio 2017, the only way is to use .pkgdef files, as explained next.

The second one is to create a .vsix extension (package) that provides enhanced design-time support and uses a .pkgdef file to create those registry entries. See Registering a Package-Based DDEX Provider. This is the approach used by MySQL. For Visual Studio 2015 you can see that it installs an extension in the folder:
C:\Program Files (x86)\Microsoft Visual Studio 14.0\Common7\IDE\Extensions\Oracle\MySQL for Visual Studio\1.2.6.

In that folder you can find the MySql.VisualStudio.pkgdef that creates the registry entries:

So, Oracle needs to modify the MySQL package to support Visual Studio 2017. Alas, their vsix manifest is still using version 1.0:

and that is because they wanted to support Visual Studio 2010, 2012, 2013 and 2015 with a single .vsix file:

  • Visual Studio 2010 only supports manifests with version 1.0.
  • Version 2.0 was introduced by Visual Studio 2012, and it is not backwards compatible, so Visual Studio 2010 doesn’t support it.
  • While Visual Studio 2012, 2013 and 2015 support manifests with version 2.0, they also support manifests with version 1.0. So a single .vsix can target Visual Studio 2010, 2012, 2013 and 2015.
  • Visual Studio 2017 doesn’t support manifests with version 1.0. So, it is not possible to have a single .vsix for Visual Studio 2010, 2012, 2013, 2015 and 2017.
  • Instead, Visual Studio 2017 requires a manifest with version 3.0.
  • Fortunately, version 3.0 is backwards compatible with version 2.0 (version 3.0 adds a Xml entry that is only recognized by Visual Studio 2017 and ignored by previous versions. See section Changes Affecting VSIX Format and Installation). So, a single .vsix can target Visual Studio 2012, 2013, 2015 and 2017.

The bottom line is that two installers will be required for MySQL to target the last five versions of Visual Studio 2010-2017. It’s a pity that Oracle hasn’t used the previous months to make all these changes, frustrating its users.

Visual Studio turns 20, and its extensibility too!

Visual Studio is celebrating its 20th anniversary these days! Twenty years ago Visual Studio 97 was launched and on March 7 Visual Studio 2017 RTM has been released in a livestreamed two-day launch event at https://launch.visualstudio.com. You can share your story with Visual Studio with the hashtag #MyVSStory.

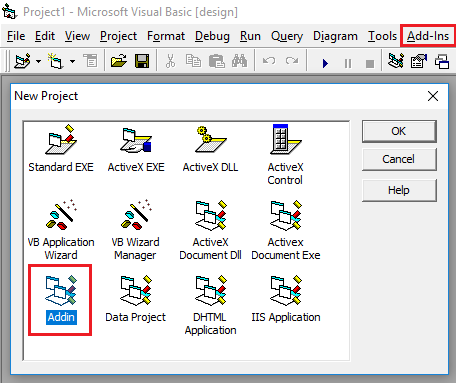
My story with Microsoft tools started some years earlier, in 1994. During college I learned Modula-2 (similar to Pascal), C and some C++. In my first job, my boss gave me a book and told me to learn Visual Basic 3.0 in two weeks, and I fell in love with the language and IDE in a couple of days, as soon as I saw a VBX control to show maps. VB3 lacked classes, intellisense and a lot of things, but it was very productive compared to C/C++. In 1996, VB4 was released, which came in two flavors, 16-bit and 32-bit, used OCXs and introduced classes, but no extensibility yet. In 1997 Visual Studio 97 was launched, which was a suite of separate IDEs, one for Visual C++, one for Visual Basic 5.0, etc. and for the first time, extensibility in the form of add-ins:

Only one year later, Visual Studio 6.0 was released with VB 6.0, that offered a very similar extensibility model. Next year, my company hired a contractor to develop an add-in to review the quality of the source code of our applications. These days of Visual Studio Code Analysis (FxCop), Roslyn analyzers, SonarLint, and tons of similar extensions we take this for granted, but in 1998 there was nothing. The contractor did a good job, but after he left I felt that I could improve the add-in, so I learned the extensibility model of VB6 and I fell in love again :-). I ended developing my own add-in with new features that I released as freeware on the web.

During almost three years, from 1998 to 2001, Microsoft didn’t release a new Visual Studio, and for a good reason. The .NET Framework initiative was announced in 2001, and finally in February 2002 a brand new Visual Studio .NET was released, a unified IDE for VB.NET, Visual C++, a new language C#, etc. I learned .NET during 2002 (I fell in love again…) and the new automation model (EnvDTE) provided by the new IDE, that was completely different to the one of VB6 but inherited some strange details such as collections starting at 1 and not at 0. Visual Studio .NET 2002 provided add-ins, templates, wizards, and a new extensibility mechanism named Macros that allowed to record or to code by hand procedures to execute repetitive actions. But it didn’t provide support to create packages, nor a SDK. From the extensibility point of view, it had some oversights, such as requiring add-ins to be COM components (and therefore using COM Interop if written in a managed language instead of C++) and requiring a COM Shim (an ActiveX control developed in C++) to host managed toolwindows (and the provided COM shim had lots of problems with the tab key navigation, etc.).

Only 14 months later, in April 2003, Microsoft released Visual Studio .NET 2003, which introduced for the first time VSIP (Visual Studio Integration Program), a kind of SDK (not named as such yet) to develop native packages in C++. Later a VSIP Extras was released to use manage languages (C# at least).

Two years later Visual Studio 2005 was released, which was a great release. It introduced .NET Framework 2.0, MSBuild, and important novelties in the extensibility area: it provided a proper VS 2005 SDK for the first time, it allowed to develop packages in managed languages using the Managed Package Framework (MPF), it allowed XML-based add-ins (using an .AddIn file instead of COM-registration), it didn’t require COM shims for toolwindows, and it was gorgeous with its 24-bit color toolbars.

(In November 2006 I started to blog about Visual Studio Extensibility (VSX) with add-ins).

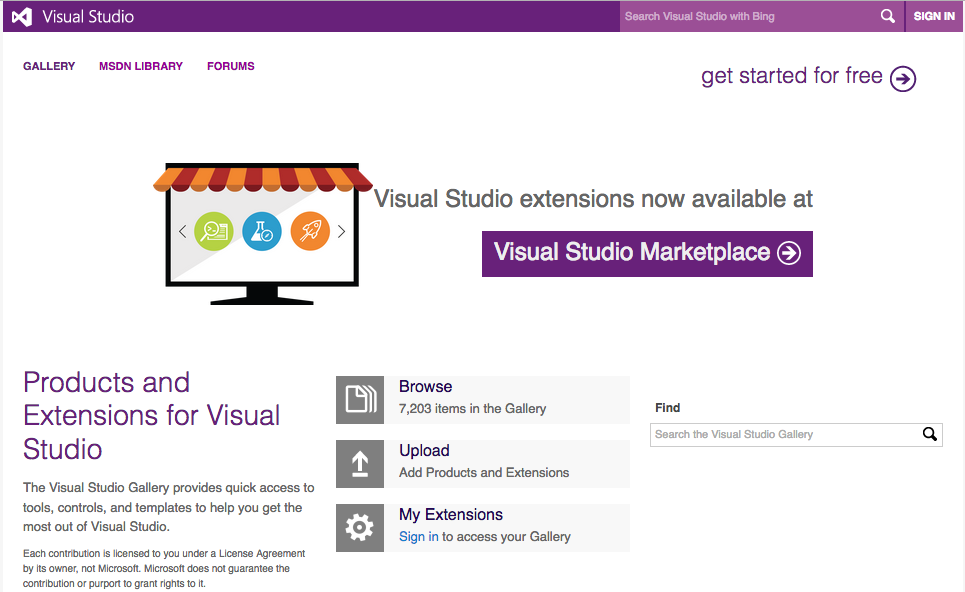
Visual Studio 2008 was the next release, which didn’t introduce anything remarkable in the extensibility area, but Microsoft introduced in February 2008 the Visual Studio Gallery:

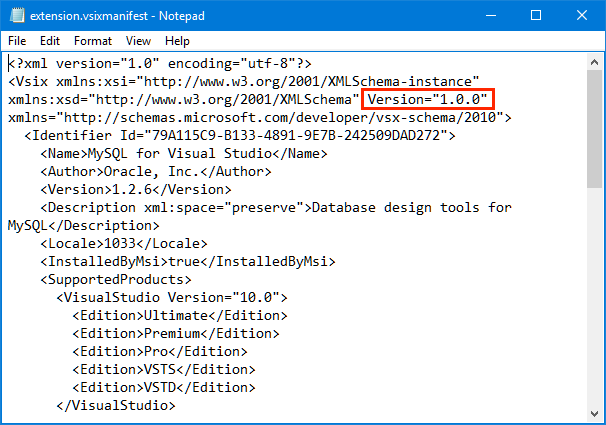
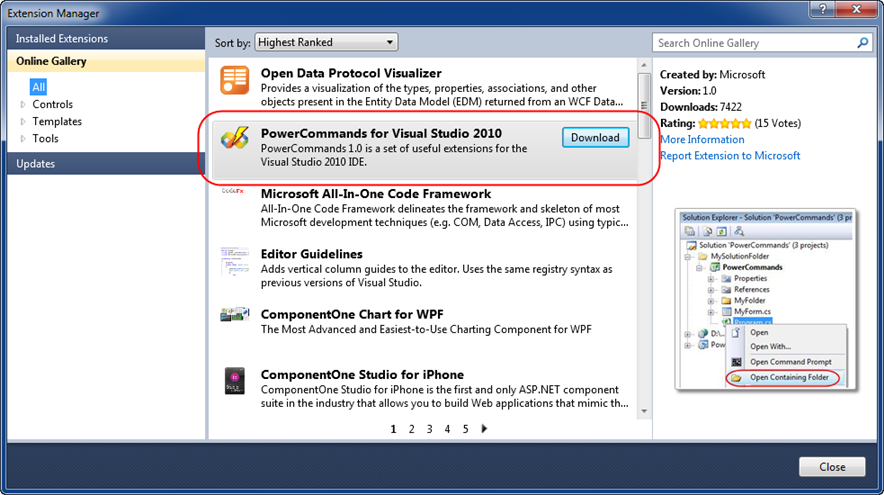
And then Visual Studio 2010 was released, which, for me, has been the best and more beautiful Visual Studio ever released, despite the insane amount of problems that caused to developers of add-ins during the betas because new Windows Presentation Foundation (WPF)-based commandbars were introduced. From the extensibility point of view, add-ins didn’t require a satellite dll for custom pictures any more, the Managed Extensibility Framework (MEF) was introduced to extend the new code editor (which was WPF-based too), changed the .ctc format to define commands and commandbars to the .vsct file that is used still today and introduced the VSIX packaging format to deploy extensions (except add-ins). It also introduced the Extension Manager:

Two years later Visual Studio 2012 was introduced, which arguably has been the most unfortunate Visual Studio version ever released. It removed colors from the user interface (and even separation lines during the betas), it used upper-case top menus (all of this despite tons of complains) and from the extensibility point of view, it removed macros, a very controversial decision that reached 6,000 votes to bring them back on UserVoice (something that happened some years later in the form of an extension for VS 2013/2015).

I think that even Microsoft realized that Visual Studio 2012 was quite disappointing, because it released Visual Studio 2013 very fast, only a year later instead of the usual 2 or 3-year cycle. Some color was brought again with themes (not too enough color for me, though), but, alas, for developers of add-in there was bad news: add-ins were still present, but officially deprecated. Packages were the primary form of extensibility for Visual Studio and finally Microsoft decided it was time to get rid of add-ins. Retrospectively I am glad of that decision because it forced me to learn packages, but it was a huge amount of work that required some thought and strategies. Visual Studio 2013 introduced big news for all developers: a free Community Edition that supported extensions, on the contrary to the former Visual Studio Express editions, a common request on UserVoice.

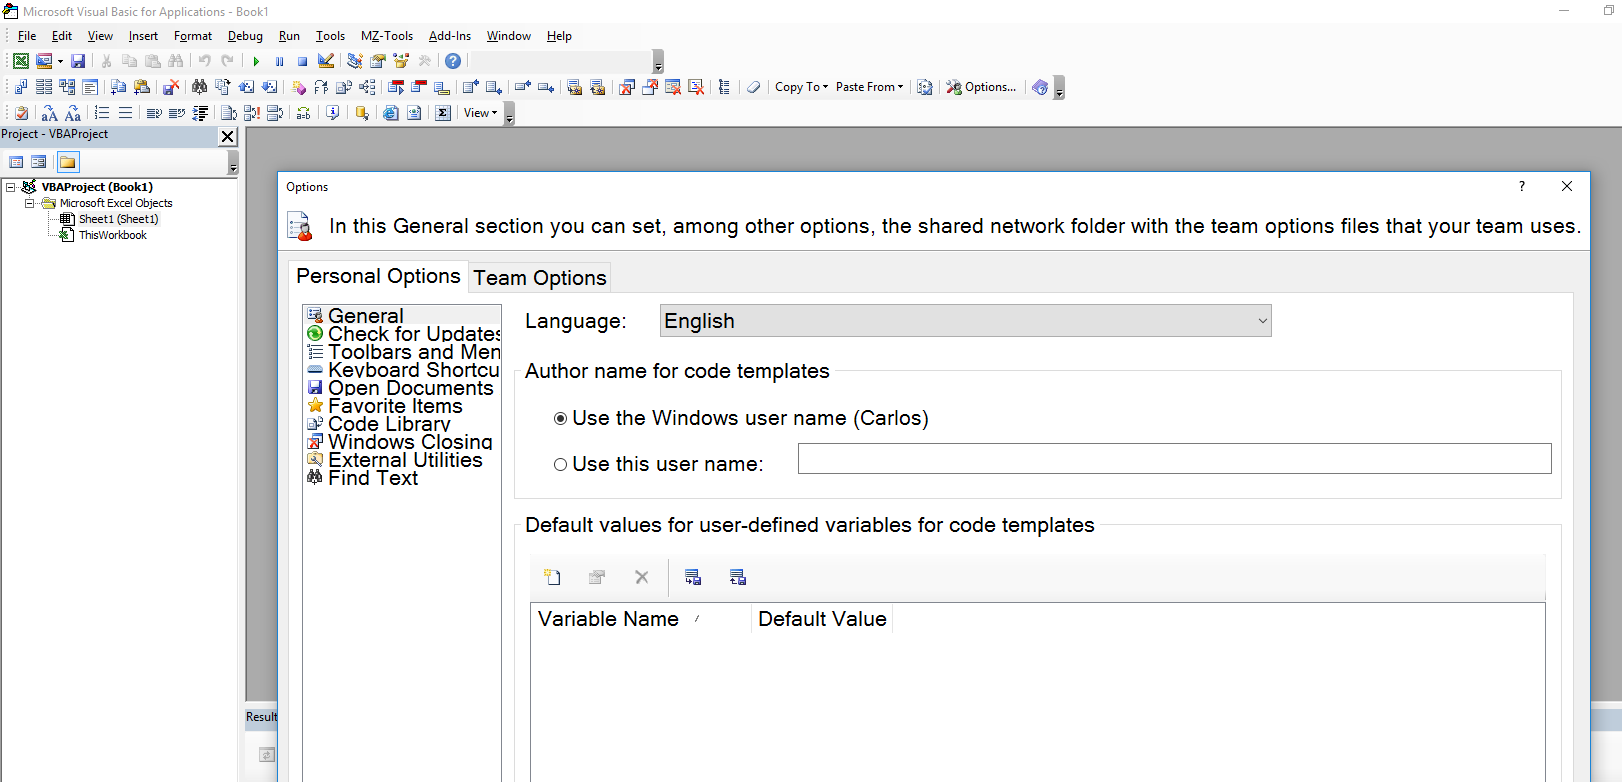
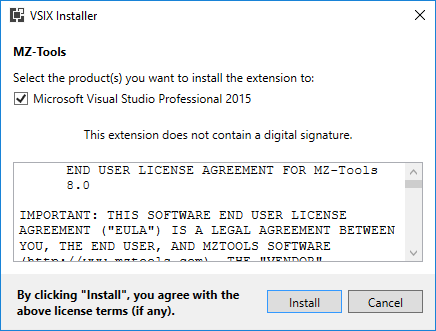
Visual Studio 2015 was released two years later, effectively removing add-ins. The venerable Add-In Manager of Visual Studio since the year 2002:

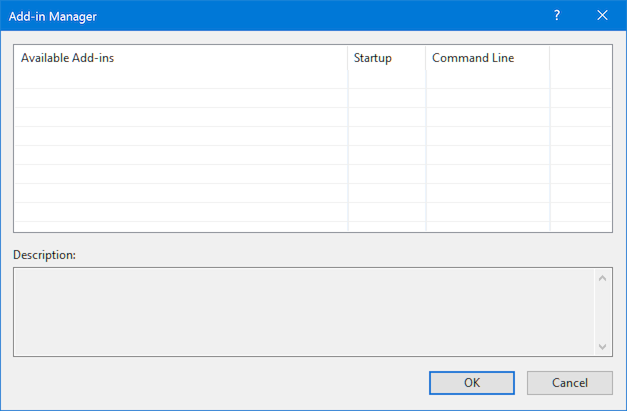
was removed and the Extensions and Updates dialog became the central window for extensions:

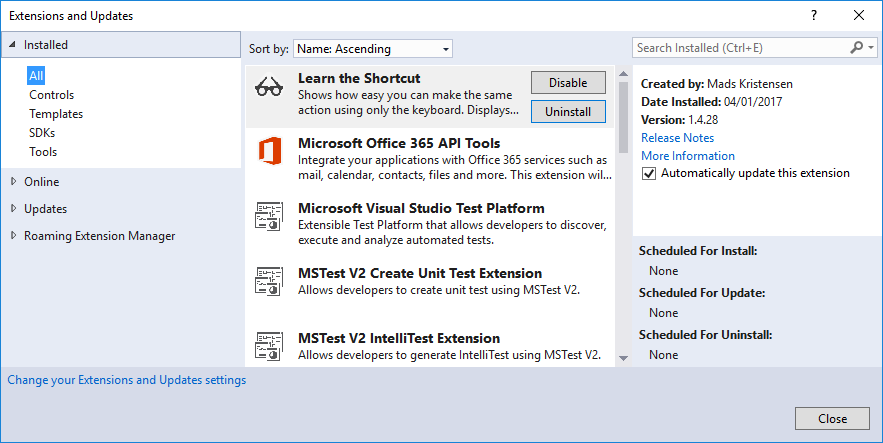
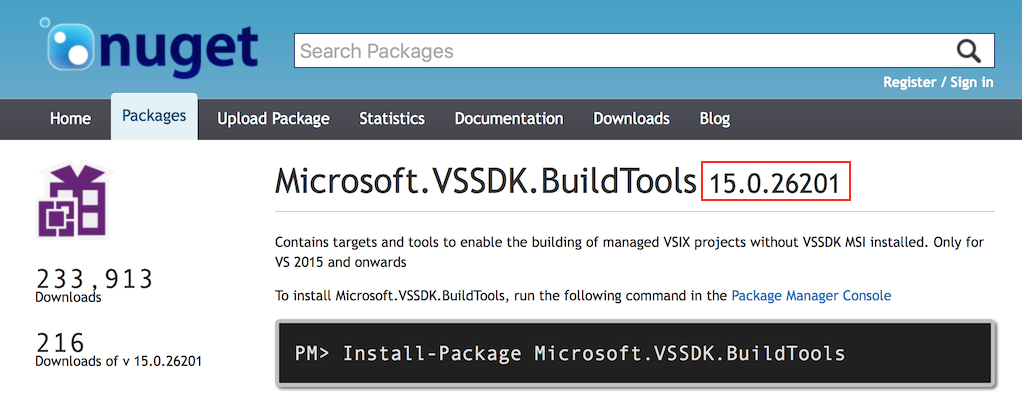
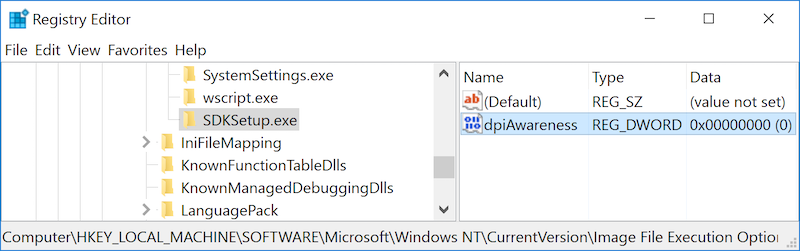
Visual Studio 2015 also brought us async packages, new ruled-based UI contexts, the Image Service and Catalog to eliminate major pain points related to asset maintenance, high DPI scaling, and theming and a huge Visual Studio Image Library. It also provided “Roslyn”, that is, the C# and VB.NET compilers as platform, and open source, so you can leverage them to build Roslyn analyzers (live code analysis without building) and code fixes.

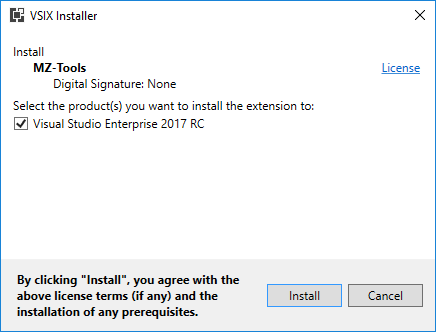
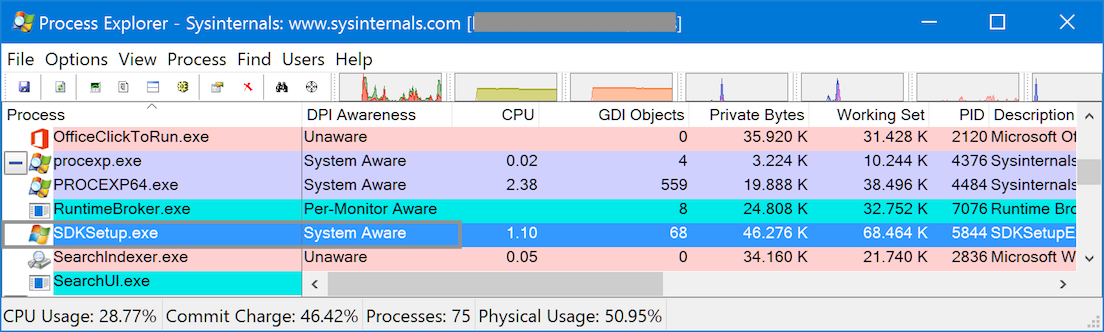
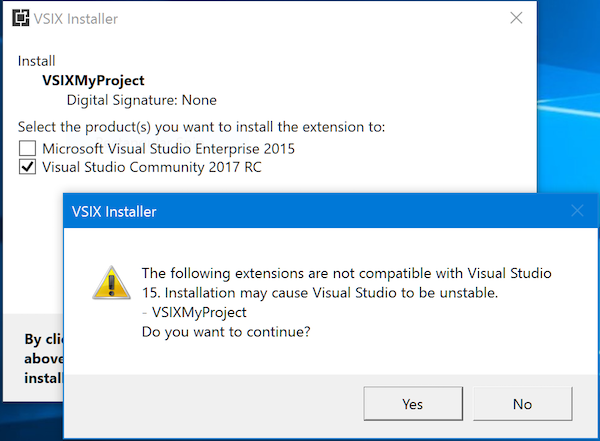
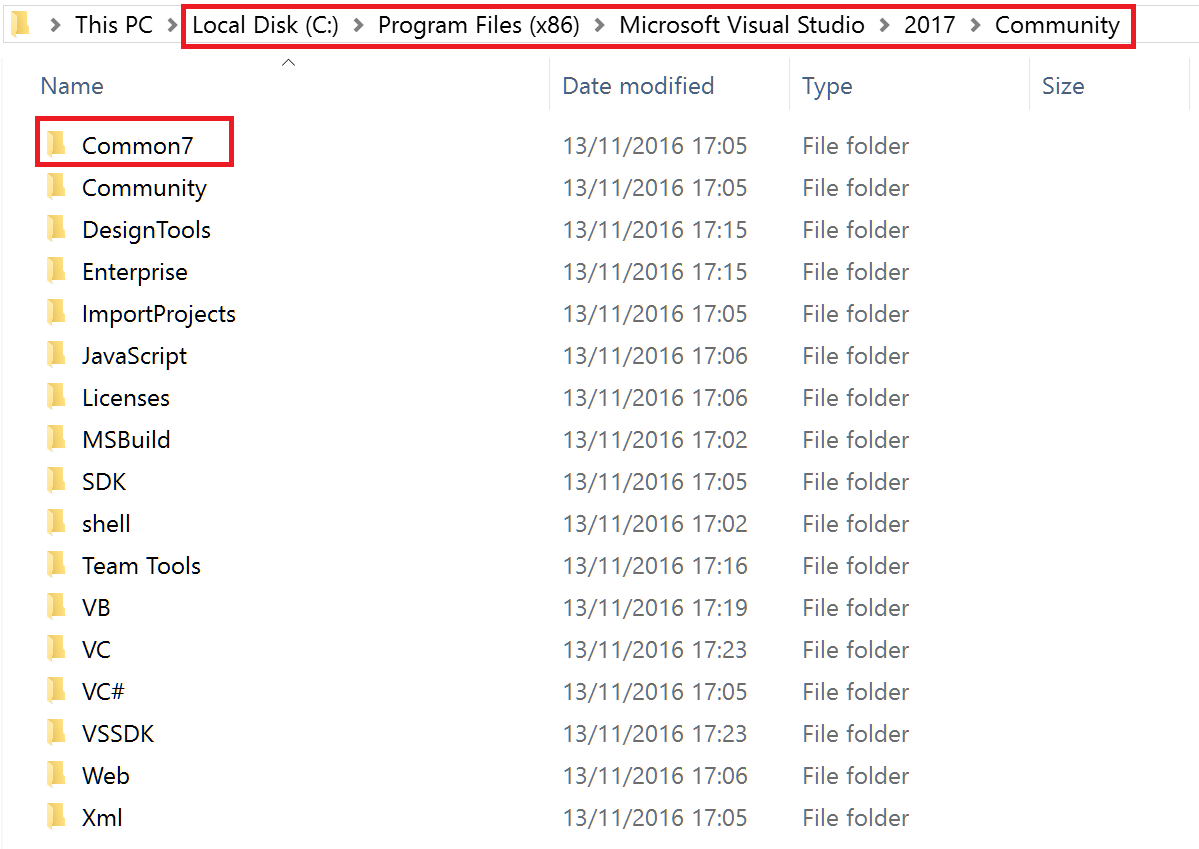
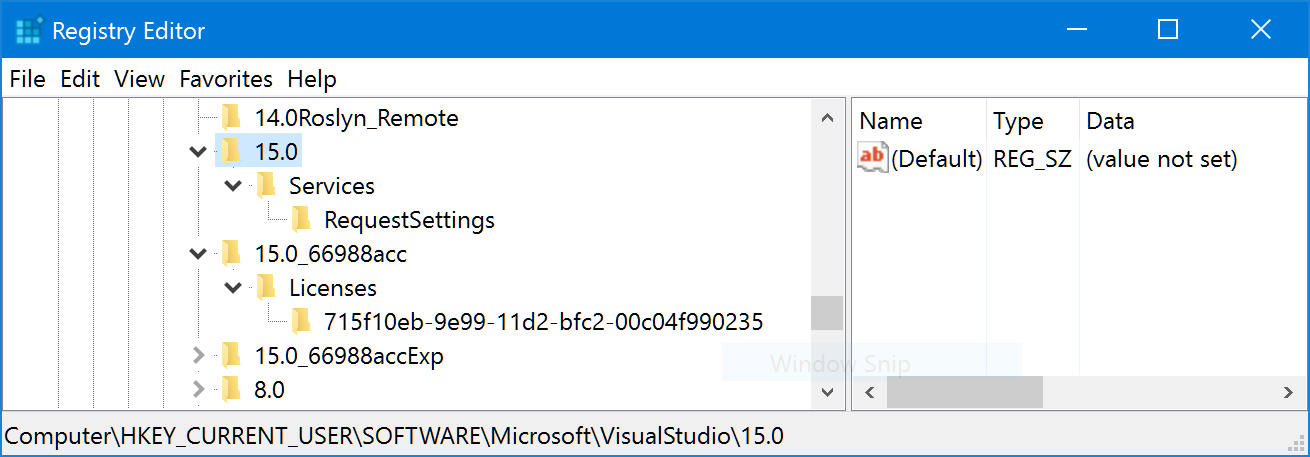
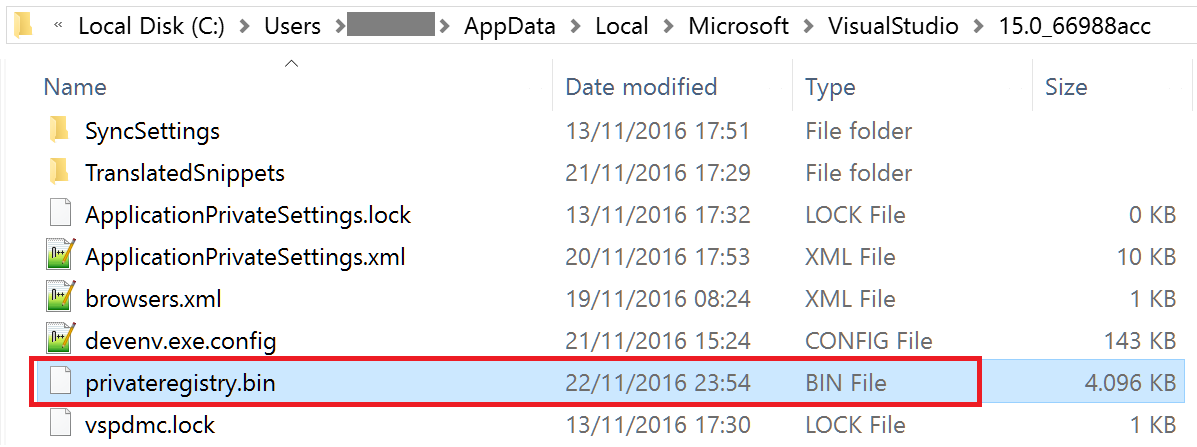
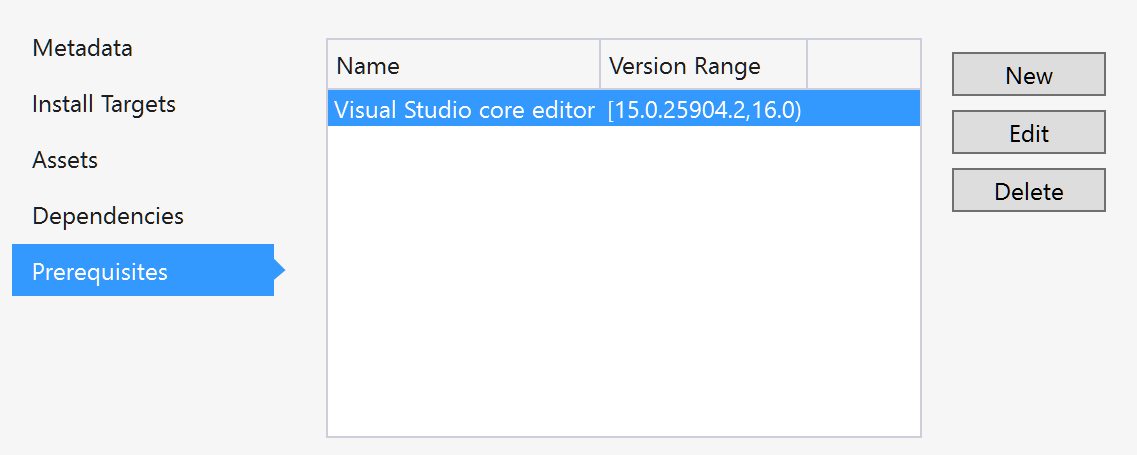
The Visual Studio 2017 version that was released on March 7 provides the Roaming Extension Manager, something that was available originally for Visual Studio 2015 as an extension. It also provides also a very light setup, very isolated and resilient, that requires some changes in extensions. A handy feature for VSX developers is that now the Community, Professional and Enterprise editions can coexist on the same computer, which allows you to test your extensions on all those editions without requiring additional computers or virtual machines.

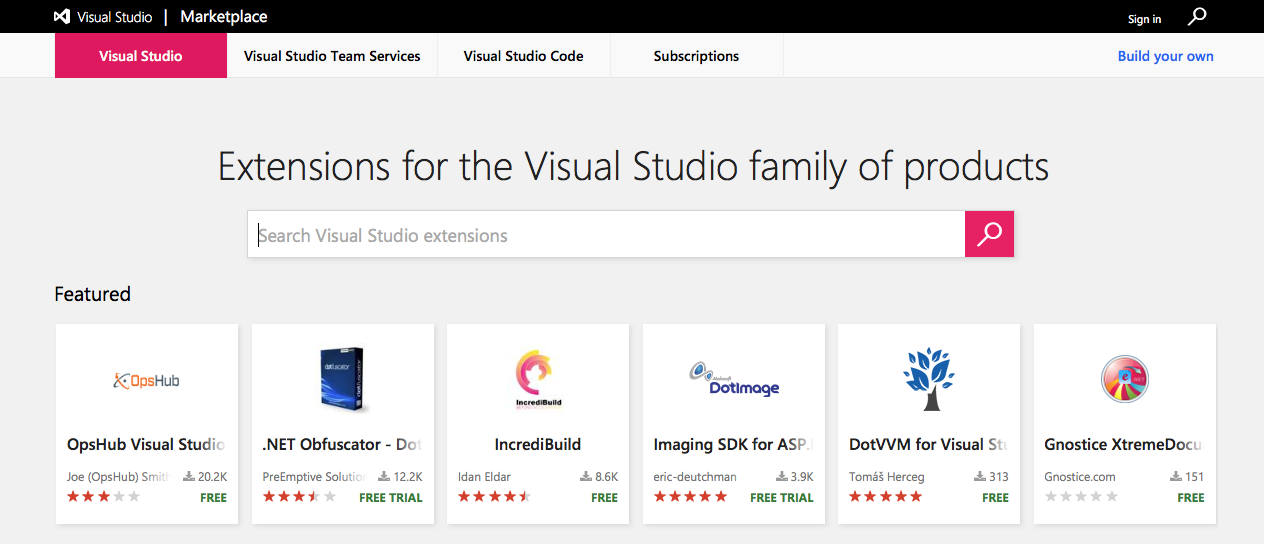
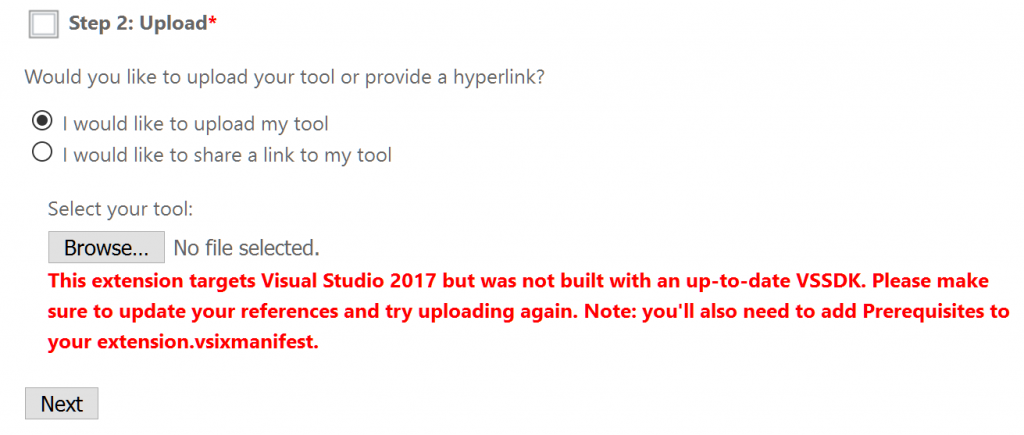
Finally, the Visual Studio Gallery is in the process to be transformed into the Visual Studio Marketplace. For Visual Studio currently it only allows to download extensions, while the publishing is still done on the Visual Studio Gallery, something that will be migrated in the next months.

For many years VSX was hard due to difficult APIs and lack of documentation and support, but now you have much better documentation, tons on samples on GitHub, including real extensions, tons of VSX developers, and several forums such as the veteran MSDN Visual Studio Integrate forum (still my favorite that I visit daily), StackOverflow or the more recent and very active Gitter (Microsoft/extendvs) chat room.

So, it has been a long journey for Visual Studio extensibility until today and likely I have forgotten some milestones. But one thing is sure: this is the best moment to be a VSX developer. Happy Birthday, Visual Studio!

More on DPI-awareness

I already blogged about Visual Studio extensions and DPI-awareness, where I detailed my experience converting my MZ-Tools extension to DPI-awareness for the most part (I haven’t updated the toolbar buttons yet because the required API only works on VS 2015 and higher).

I also mentioned how to run Visual Studio or setups with DPI virtualization (DPI-unaware) on high DPI displays, to overcome some display problems that can happen designing Windows Forms or running some old SDK setups.

My problems didn’t end there, though. One of my customers reported me a bug that happened when using a laptop with a retina display connected to a non-retina external display. I was familiar with the problem because I have suffered it too, since I own a Surface Pro 4 with a dock station that uses a non-retina display. With some combination of undocking / restart / docking, I could end with this problem using MZ-Tools 8.0 for VBA in the VBA editor of Office (click to enlarge):

I thought that I was the only person with that problem but after the bug report I knew it affected other users. Also, I noticed that when the problem happened, Notepad++ was also affected in the document tabs, and it was already reported here, here and here:

My add-in uses Windows Forms, but Notepad++ uses GDI, so it is not a problem of Windows Forms but of GDI.

Aa a workaround, I had to change all the forms and usercontrols of my add-in to detect if the font was “too big” and in such case adjust its size. Technically, the System.Drawing.SystemFonts.DefaultFont is returned huge. It happens that internally it calls GetStockObject(DEFAULT_GUI_FONT), which according to MSDN is not recommended. So, if the add-in detects that the font of the form/usercontrol is much bigger (say, two points) than the size of System.Drawing.SystemFonts.MessageBoxFont (which is not affected by the problem), then it changes the size. The problem is convoluted by the fact that I cannot reproduce it at will.

It seems that the DPI-awareness problem is so pervasive that Microsoft has invested a lot of work to fix or alleviate it on the Windows 10 Anniversary Update introducing the concept of “Mixed-Mode” DPI scaling, also known as sub-process DPI scaling, via the concept of the DPI-awareness context (MSDN documentation here) and I am glad to see that the investment will continue heavily on the new Windows  10 Creators Update, due later this year, that will introduce new enhancements, including a new DPI-awareness context (“Per-Monitor V2”), automatic DPI scaling for GDI-based apps, new Windows Forms DPI scaling improvements (for people like me still using Windows Forms) and other improvements for Internet Explorer and Windows desktop icons (that I suffer too). You can watch the following video by James Clarke and Peter Felts explaining the improvements and showing cool demos (new post and sample to follow soon):

Using VSIXInstaller.exe to install programmatically an extension to Visual Studio 2015 and Visual Studio 2017

Answering a question in the MSDN VSX forum today, I have learned another change caused by the new VSIX installer (VSIXInstaller.exe) of Visual Studio 2017 that it is worth documenting here.

As you know, in Visual Studio 2015 only one edition (Community, Professional or Enterprise) could be installed on the same machine. Two or more editions couldn’t coexist at the same time. Given that the Enterprise edition includes the features of the Professional edition and that the Community edition is basically the Professional Edition (without some feature such as CodeLens), the VSIX manifest of your extension could target the “Pro” edition and as such it would be installable on any edition (Community, Professional or Enterprise):

Normally a .VSIX file is installed just double-clicking it, so that the VSIXInstaller.exe application is launched. But if you want to install an extension programatically, the VSIXInstaller.exe application offers a few command-line switches:

Notice the /skuName:<name> option: it allows to specify the exact edition (Enterprise, Premium, Pro, Community, etc.) of Visual Studio where you want to install the extension. Which value you would need to use? It happens that for Visual Studio 2015, you can use “Pro” and the extension will be installed happily not only on Visual Studio 2015 Professional, but also on Visual Studio 2015 Community or  (Updated March 1, see comments section) Visual Studio 2015 Enterprise. For example, installing my MZ-Tools extension on Visual Studio 2015 Enterprise edition with this command line works perfectly:

vsixinstaller.exe /skuName:Pro /skuVersion:14.0 “<path>\MZTools8VSPackage.vsix”

(notice that it recognizes my Enterprise edition as Professional edition).

However, the same is not true for VS 2017. Using this command line to install it on my Visual Studio 2017 Enterprise edition:

vsixinstaller.exe /skuName:Pro /skuVersion:15.0 “<path>\MZTools8VSPackage.vsix”

causes this error:

The following command-line is required, targeting specifically the Enterprise edition:

vsixinstaller.exe /skuName:Enterprise /skuVersion:15.0 “<path>\MZTools8VSPackage.vsix”

So, this is another implication of the new modular setup of Visual Studio 2017 for VSX developers. You can query the installed VS 2017 editions with a new Setup API (sample included).

Videos and extensions by Justin Clareburt, Program Manager in Visual Studio Extensibility

Justin Clareburt, Program Manager in Visual Studio Extensibility, and super passionate about VSX and super active in the Microsoft/extendvs Gitter room to help you to update successfully your extension to Visual Studio 2017, has also time to produce videos and to create extensions!:

The first video is with Seth Juarez, about using keyboard mappings in Visual Studio:

And his “hot” extensions:

– Hot Keys: Visual Studio Extension that imports several new keyboard mapping schemes http://aka.ms/hotkeys

– Hot Commands: Provides additional commands and shortcuts for enhanced productivity http://aka.ms/hotcommands

The second video is with Robert Green (Visual Studio Toolbox) about updating your extension to the new Visual Studio 2017:

Microsoft.VSSDK.BuildTools 15.0 no longer in Preview/Release Candidate

Just in case you haven’t noticed it, the NuGet package for Microsoft.VSSDK.BuildTools 15.0 is no longer Preview or Release Candidate (RC, RC2 or RC3) but final release:

As you can see, it has been a long way of previews / RCs to reach this point:

So, it’s time to update that NuGet package and rebuild. Microsoft hasn’t announced yet the release date of the final version of Visual Studio 2017 but it seems that we are approaching that date, at least from the Visual Studio Extensibility point of view. Update (Feb 10): the launch date has been announced for March 7. If you haven’t updated your extension to support VS 2017 yet, the clock is ticking. Here you have the guidance to do it.

Running Visual Studio or setups with DPI virtualization (DPI-unaware) on high DPI displays

This is another cross-post from my other web site, Visual Studio Resources, that may be of your interest as a VSX developer if your extension uses Windows Forms or .NET 2.0/3.0/3.5 tooling (included in WinSDK 7.1, but not in WinSDK 8.0 or higher):

The high-DPI (retina) displays pose some problems to us developers, so that we need to modify our applications to make them DPI-aware. In the post Visual Studio extensions and DPI-awareness I explained how I became DPI-aware and the painful experience to make my application (an extension for Visual Studio) DPI-aware. If you don’t know about DPI-awareness, start with that post.

In this post, I am going to explain how to do the opposite: to make an application that claims to be DPI-aware run as DPI-unaware. Technically this is called DPI virtualization mode, where the application thinks that it is running at 96 dpi and the Windows OS scales its window as a bitmap to the proper size. The result is that the application appears blurred but it’s usable, while in DPI-aware mode it has problems (by the way, if your problem is the opposite, see the Knowledge Base article Some desktop applications may appear blurred on high-DPI displays).

I have found a couple of scenarios where I have wanted some applications to become DPI-unaware even at the cost of appearing blurred on my retina display:

The first case is designing Windows Forms with Visual Studio. Modern versions of Visual Studio (2015, 2017) are truly DPI-aware but they alter the designer files of Windows Forms, so you need to either use a non-retina display, or to use a virtual machine with retina display disabled or to set the retina display scaling to 100% instead of 200% or 250%, which makes everything tiny and unreadable. But there is a better solution: you can make Visual Studio (or any process) DPI-unaware adding the following registry entry:

[HKEY_LOCAL_MACHINE\SOFTWARE\Microsoft\Windows NT\CurrentVersion\Image File Execution Options\devenv.exe]
"dpiAwareness"=dword:00000000

(Thanks to Tanya Solyanik, from Microsoft, that provided me this trick).

The other case is an application that claims that it is DPI-aware, but it is not really. For example, the setup of the Windows SDK 7.1 (you may download it as winsdk_web.exe, but once executed the process is really sdksetup.exe). You can see here in Process Explorer that it claims that its DPI-awareness is “System Aware”:

But when executed on a retina display, it becomes tiny and truncated:

When creating the registry entry above for SDKSetup.exe:

then it displays with the correct size and without truncations, that is, usable (although blurred):

I hope this post helps if you are in one of those two scenarios.

It’s time to change the VSIX manifest of your extension to v3 for Visual Studio 2017 compatibility

I still see, even as today Jan 10, people asking why you get this error when trying to install your extension on Visual Studio 2017 RC:

“The following extensions are not compatible with Visual Studio 15. Installation may cause Visual Studio to be unstable”:

or this other one when you try to upload the extension to the Visual Studio Gallery:

“This extension targets Visual Studio 2017 but was not build with an up-to-date VSSDK. Please make sure to update your references and try uploading again. Note: you’ll also need to add Prerequisites to your extension.vsixmanifest.”:

In both cases, the answer is the same: you have just updated the extension.vsixmanifest of your Visual Studio 2015 extension to add 15.0 (for Visual Studio 2017):

 <Installation>
 <InstallationTarget Id="Microsoft.VisualStudio.Community" Version="[14.0, 15.0]" />
 </Installation>

But that is not enough to add compatibility for Visual Studio 2017. Even worse, some people wonder if you can live ignoring those warnings.

The short answer to make an extension compatible with Visual Studio 2017 is the following:

  • You need to build it with Visual Studio 2017, you cannot use Visual Studio 2015 (at least at this time). Updated (Feb 7): actually you can build with VS 2015. Updated (Mar 3): as explained in the FAQ entry Can I build a VSIX v3 with Visual Studio 2015?
  • You need an updated pre-release VS SDK (via NuGet). Updated (Feb 7): The Nuget VSSDK 15.0 is no longer prerelease. This VS SDK generates two additional files (catalog.json and manifest.json) inside the output .vsix file (which being a .zip file really, you can rename and unzip to inspect) that were not present in the .vsix generated by the VS 2015 SDK.
  • You need to update the InstallationTarget range in the extension.vsixmanifest (likely this is the only thing that you have done).
  • You need to convert the extension.vsixmanifest to version 3, which is the only version that Visual Studio 2017 accepts (and the Visual Studio Gallery for extensions targeting Visual Studio 2017). Version 3 is backwards compatible with version 2, which means that all fields are the same (including the Version=”2.0.0″!). The only difference is that version 3.0 adds a mandatory section for the prerequisites. At the very least you need to specify the Visual Studio Core Editor (Visual Studio 2017 has an editor to enter values in a friendly way):
<Prerequisites>
   <Prerequisite Id="Microsoft.VisualStudio.Component.CoreEditor" Version="[15.0.25904.2,16.0)" DisplayName="Visual Studio core editor" />
</Prerequisites>

The long answer, with links to resources is on my post Visual Studio 2017 RC announced. Extensions need some changes, and for advanced topics read Some implications of the new modular setup of Visual Studio 2017 for VSX developers.

Now, once that you have assumed that you need a v3 VSIX manifest for Visual Studio 2017, you may wonder how to support multiple instances of Visual Studio from VS 2010 to VS 2017 with the same .vsix: you can’t, because VS 2010 only accepts manifest v1, while VS 2012, VS 2013 and VS 2015 accept manifest v1, v2 or v3 (backwards compatible with v2), and VS 2017 only accepts manifest v3. You need two .vsix files. So, you have two choices:

  • Create a VSIX with manifest v1 for VS 2010, VS 2012, VS 2013 and VS 2015, and another VSIX with manifest v3 for VS 2017. This is the most suggested approach, but there is a better one.
  • Create a VSIX with manifest v1 for VS 2010, VS 2012 and VS 2013, and another VSIX with manifest v3 for VS 2015 and VS 2017. Why? Because VS 2015 introduced APIs not available in previous versions that you can use in VS 2015 and VS 2017 to make your extension a better citizen, such as How to: Use AsyncPackage to Load VSPackages in the Background and How to: Use Rule-based UI Context for Visual Studio Extensions.
  • Updated (Feb 7): if you are not targeting VS 2010 but only VS 2012 and higher, you can have a single VSIX using v3 for VS 2012, 2013, 2015 and 2017.

To get support from Microsoft, you can become a Microsoft Visual Studio Industry Partner (VSIP) “Basic” level for free and get access to workshops explaining the migration process, or you can use Gitter (Microsoft/extendvs), where people from Microsoft and other VSX developers answer questions, the MSDN Visual Studio Integrate Forum that I visit daily, or StackOverflow. And if you find bugs or want to provide suggestions to Microsoft, you can also send feedback to Microsoft about Visual Studio Extensibility through several ways.

Licensing the Visual Studio family of products (or using them for free)

This is a cross-post from my other web site, Visual Studio Resources (no longer available). If you as individual or your team are starting to develop paid or open source extensions for the Visual Studio family of products, the first thing is to know which products you can use legally.

A common question that you may have about using legally Visual Studio is which are your options. As always happens with licensing, it is a somewhat complex subject with quite a lot of options, but the good news is that if you are an individual developer or a small team, you can use all the family of Visual Studio products for free. I am not a lawyer, so validate all this information with a lawyer or legal department. The purpose of this post is to provide you the pointers to the different options.

The first thing to know are the products and editions:

  • Visual Studio
    • Visual Studio Community Edition
    • Visual Studio Professional Edition
    • Visual Studio Enterprise Edition
  • Visual Studio Code
  • Azure DevOps (formerly Visual Studio Team Services, VSTS)
  • Azure DevOps Server (formerly Team Foundation Server, TFS)
    • Azure DevOps Server
    • Azure DevOps Server Express Edition

Licensing Visual Studio

Visual Studio Professional Edition and Enterprise Edition are paid versions, while the Community Edition is free for some scenarios.

You can compare the three editions on this page:

Compare Visual Studio Offerings

For Visual Studio Professional Edition and Enterprise Edition, you can compare the purchase options (Standalone for the Professional Edition, or Standard / Cloud subscriptions for both editions) on this page:

Visual Studio Purchasing Options

Visual Studio Community Edition is free under these scenarios (see Visual Studio Community):

  • For individuals: Any individual developer can use Visual Studio Community to create their own free or paid apps.
  • For non-enterprise organizations (meaning those with ≤250 PCs and ≤$1 Million US Dollars in annual revenue): Up to five users can use Visual Studio Community.
  • For enterprise organizations (meaning those with >250 PCs or >$1 Million US Dollars in annual revenue): Visual Studio Community can be used for the following scenarios:
    • In a classroom learning environment
    • For academic research
    • For contributing to open source projects

The exact details for the license terms of the latest Visual Studio versions of the Community edition are here:

MICROSOFT SOFTWARE LICENSE TERMS. MICROSOFT VISUAL STUDIO COMMUNITY 2015

MICROSOFT SOFTWARE LICENSE TERMS. MICROSOFT VISUAL STUDIO COMMUNITY 2017

MICROSOFT SOFTWARE LICENSE TERMS. MICROSOFT VISUAL STUDIO COMMUNITY 2019

Licensing Visual Studio Code

Visual Studio Code is both open source and free. The detailed license is here:

MICROSOFT SOFTWARE LICENSE TERMS. MICROSOFT VISUAL STUDIO CODE

Licensing Azure DevOps (formerly Visual Studio Team Services, VSTS)

Azure DevOps distinguishes three kind of users:

  • Free Stakeholders: you can have unlimited free users with “Stakeholder” access level, with a limited number of features (create, edit and search work items, view backlogs and boards, approve releases, etc.). This access level is not intended for developers (they cannot manage source code in private repositories).
  • Free Users with “Basic” access level.  These can do more things and this level is intended for developers. You can have up to 5 free users with “Basic” access level.
  • Paid Users: If you need more than 5 free users for your team, you need to pay for more users, which get more things than the free users with “Basic” access level, such as a Team Foundation Server CAL (Client Access License) to access an on-premises Azure DevOps Server. For details see: Azure DevOps Server Pricing.

Licensing Azure DevOps Server (formerly Team Foundation Server, TFS)

If you don’t like the idea of using Azure DevOps on the cloud, you can use it on-premises with Azure DevOps Server:

  • For individuals or teams up to 5 developers, you can use the free Azure DevOps Server Express, that you can download here.
  • For teams with more than 5 developers you need to pay for the additional developers as explained here: Buy access to Azure DevOps  or Azure Test Plans.

Finally, the ultimate guide for licensing Visual Studio, Azure DevOps or Azure DevOps Server is this white paper:

Visual Studio Licensing White Paper (May 2019)

Updated (Jul 9, 2019): updated links and names for the latest Visual Studio versions and products

Some implications of the new modular setup of Visual Studio 2017 for VSX developers

As you may already know, VS 2017 (formerly VS “15”) introduces a couple of very welcomed changes:

  • It provides a new modular setup that allows you to decide which tools (“workloads”) you want to install and, most importantly, which ones you don’t want at all. The consequence is that installing VS 2017 is much, much faster (unless you install a lot of workloads, of course). This suggestion had almost 2,000 votes on UserVoice. For VSX developers like me that already have six versions of Visual Studio installed (from VS 2005 to VS 2015) on the main dev machine (not counting isolated installations on virtual machines) and know how painful each installation is, this is big news.
  • Visual Studio 2017 allows to coexist several editions on the same machine. So, you can have VS 2017 Community Edition, VS 2017 Professional Edition and VS 2017 Enterprise Edition. This may not be very useful for end users, but for VSX developers it allows you to test your extension (which needs to declare the minimum supported edition in the Vsix manifest) on the three editions on the same computer. Here you can see my computer with the Community edition installed (notice the familiar “Common7” folder inside the “Microsoft Visual Studio\2017\Community” folder):

vs2017communityinstallation

If you want the details about the new setup experience, the official posts from Microsoft about this on the Visual Studio blog are the following:

Faster, Leaner, Focused on Your Development Needs: The New Visual Studio Installer

Visual Studio “15”: Installing Just What You Need

Anatomy of a Low Impact Visual Studio Install

On the Road to Release: Redesigning Visual Studio Installation

Visual Studio “15” Preview 4

But not only that. Visual Studio 2017 is also much more isolated and resilient. It doesn’t install Visual Studio assemblies in the Global Assembly Cache (GAC) and it doesn’t use for the most part the main Windows Registry. In the past (since VS 2010, see my post The strange case of the registry key HKEY_CURRENT_USER\Software\Microsoft\VisualStudio\10.0_Config\Projects\{C8D11400-126E-41CD-887F-60BD40844F9E}), Visual Studio redirected HKEY_LOCAL_MACHINE\Software\Microsoft\VisualStudio\<version> to HKEY_CURRENT_USER\Software\Microsoft\VisualStudio\<version>_Config, to allow installation of extensions through .pkgdef files without admin rights, etc. Now, VS 2017 uses its own private registry. See how empty is the regular HKEY_CURRENT_USER\Software\Microsoft\VisualStudio\15.0 key on my machine and notice that there is no 15.0_Config key:

vs2017config

Instead, the VS 2017 private registry is stored in your AppData folder:

privateregistry

Fortunately, you can use regedit.exe to load a private hive. You need to select the HKEY_USERS node, and click the File > Load Hive… menu. You select the privateregistry.bin file, give a name to the hive (I entered “VS2017PrivateRegistry”) and now you can see the 15.0<id>_Config key populated as usual (note: use File > Unload Hive when done):

vs2017privateconfig

Hopefully all this isolation and resilience can prevent the problems that I suffered with VS 2015 when my Surface Pro 4 crashed at boot time due to a buggy antivirus update (I never recovered VS 2015).

So far, so good, but all this will cause some issues to VSX developers. I adapted my MZ-Tools extension to run in Visual Studio 2017 some weeks ago and I am these days migrating my old .NET-based custom builder for MZ-Tools to fully embrace MSBuild and hopefully to use a separate Windows Azure build server, better environment/workspaces isolation, etc.

The changes above can cause some trouble:

  • The location of devenv.exe for Visual Studio 2017 has changed, and can be several of them.
    As explained above, you can have now several Visual Studio 2017 installations on your machine. In the past (until Visual Studio 2015) you could query the HKEY_LOCAL_MACHINE\SOFTWARE\WOW6432Node\Microsoft\VisualStudio\14.0, InstallDir entry, to get the (only) installation folder for Visual Studio (2015). Now, there can be several Visual Studio 2017 installation folders (Community, Professional, Enterprise), and you cannot query the registry directly. Instead, the official approach is to use some interop assemblies (Microsoft.VisualStudio.Setup.Configuration.Interop) provided by Microsoft to enumerate the Visual Studio 2017 installations. See the post Changes to Visual Studio “15” Setup and the Microsoft/vs-setup-samples samples on GitHub. Of course, for your own use on your own build script you can hardcode paths ;-).
  • External processes cannot read Visual Studio 2017 registry entries directly.
    Extensions can read Visual Studio 2017 registry entries from the private registry in a transparent way, because being dlls, they run in-process with devenv.exe and leverage the redirection provided by Visual Studio. But out-of-process executables or scripts need to use the  RegLoadAppKey function. See the section “Change: Reduce registry impact” in Breaking Changes in Visual Studio 2017 extensibility.
  • The location of MSBuild for VS 2017 has changed, and can be several of them.
    In the past (until Visual Studio 2015), the path of MSBuild was “C:\Program Files (x86)\MSBuild\<version>”, where <version> was “4.0”, “12.0” (VS 2013), “14.0” (VS 2015). There is no “15.0” folder there for VS 2017. Instead, MSBuild for VS 2017 is installed in the folder “C:\Program Files (x86)\Microsoft Visual Studio\2017\<edition>\MSBuild\15.0”, where edition can be “Community”, “Professional” or “Enterprise”. Again, for your own use on your own build script you can hardcode the path, but if you want to use a more proper way, you need to get the VS 2017 installation folder as explained above and concatenate “MSBuild\15.0”. Or you can wait until Microsoft releases a document about how to resolve MSBuild location (they are working on it and now that MSBuild is open source you can follow the progress on GitHub). BTW, you can download the MSBuild Tools for Visual Studio 2017 RC here.
  • The location of tf.exe (Team Explorer command-line) has changed.
    In the past, for Visual Studio 2013 and 2015 it was stored in the folder C:\Program Files (x86)\Microsoft Visual Studio <version>\Common7\IDE. For Visual Studio 2017, it is installed in the folder of the Team Explorer extension (C:\Program Files (x86)\Microsoft Visual Studio\2017\<edition>\Common7\IDE\Extensions\<random folder>). Fortunately, there is a shortcut in the folder C:\Program Files (x86)\Microsoft Visual Studio\2017\Community\Common7\IDE\CommonExtensions\Microsoft\TeamFoundation\Team Explorer that point to that location. Did I mention that there can be several editions of Visual Studio 2017 installed?
  • The VsWebSite.Interop.dll automation file is not included in the Core Editor and causes FileNotFoundException.
    The EnvDTE automation assemblies don’t provide extensibility for all kind of projects (for example, you cannot get project references for VB/C# projects with that assembly). For VB/C# projects, you need the VSLangProj.dll family of assemblies. Both EnvDTE and VSLangProj are included by default with the Core Editor of Visual Studio 2017 and therefore your extension will work just declaring Visual Studio Code Editor as dependency in the new Vsix Manifest editor for version 3:vs2017coreeditordependency
    Those assemblies are also valid for Web Application projects. However, Visual Studio 2005 introduced Web Site projects, that lack a project file and Microsoft provided the VsWebSite.Interop.dll family of assemblies to deal with that kind of projects using automation (for example, to get their references). Alas, the VsWebSite.Interop.dll assembly is not included in the core editor, and therefore each time that a method of your extension uses its types (when the method is JIT-compiled) will cause FileNotFoundException. For example a method with this code:
foreach (EnvDTE.Project project in solution.Projects)
{
   langProject = project.Object as VSLangProj.VSProject;
   if (langProject != null)
   {
   ...
   }
   else
   {
       webProject = project.Object as VsWebSite.VSWebSite;
       if (webProject != null)
       {
       ...
       }
   }
}

I reported this to Microsoft through private channels and on Microsoft Connect (VsWebSite.Interop.dll extensibility assembly not installed by Visual Studio core editor) and the only answer so far has been that the extension must declare a dependency on the Microsoft.VisualStudio.WebTools (which installs that assembly), but that is not a solution for me since:

1) That component installs tons of files related to web development, not only VsWebSite.Interop.dll. The user should not be forced to install web-related stuff (project templates, etc.) that she doesn’t require and that would dirty the Visual Studio installation for that simple extension to work.

2) Even if only VsWebSite.Interop.dll was installed by that Microsoft.VisualStudio.WebTools component it would be annoying for users to install that component.

It is a good thing that Microsoft uses EnvDTE / VSLangProj internally and therefore they needed to include them in the Core Editor. Otherwise they wouldn’t be there either. You know that I am not very fan of EnvDTE/VSLangProj although I still use them very heavily (Microsoft has insisted that they are not going to disappear or be deprecated).

Fortunately, there is a workaround, that is what I used. I refactored the methods of MZ-Tools that use the types of VsWebSite.Interop.dll to move the code inside the method that uses the types to a new method and then handled gracefully the FileNotFoundException. For example:

public Collection References
{
   get
   {
      Collection references = new Collection();

      AddLangProjReferences(references);

      if (references.Count == 0)
      {
         try
         {
            AddWebSiteReferences(references);
         }
         catch (System.IO.FileNotFoundException)
         {
            // This can happen in VS 2017 if the web development workload is not installed 
         }
      }
      return references;
   }
}

I hope this post helps you. Happy coding!